So you want to setup Constant Contact with WordPress? Looking to start email marketing for free? Well, look no further. Email marketing is what I recommend everyone get involved in after they create a WordPress blog because it opens the world to so many possibilities. Once you setup email marketing you can build an email list of 10, 100, or 1000 people, send your eBook automatically, and generally look way more professional than bloggers who don’t use email marketing!
In this tutorial I’ll show you how to setup email marketing for free using a free plugin and free trial of the software we consider the best email marketing software for beginners (which is Constant Contact!).
Ready? Let’s do this!
Note 1: I know there are a lot of steps below, but this covers everything you need! Just complete one at a time. The average completion our readers have reported is 25-35 minutes…not bad!
Note 2: We will also see how to create a custom email address like greg@dearblogger.com. All of the best email marketing providers recommend you send newsletters and so on from a custom address, and not a Gmail or Hotmail. We will make a custom email address at the HostGator cPanel, however you can do this step at any web host, or just skip this step entirely and it will work fine.
Video Guide to Get Everything Setup
If you can’t watch or would simply rather not, I’ve written out every step in the video below, along with screenshots at each point so you won’t get lost.
Step 1) Create Your First Form
WP Forms (the free version, created by the awesome folks at WPBeginner) gives us a default Newsletter Signup Form. This free email form is the perfect fit for our job today.
You can customize this free email form a TON. We will see how to change the form below.
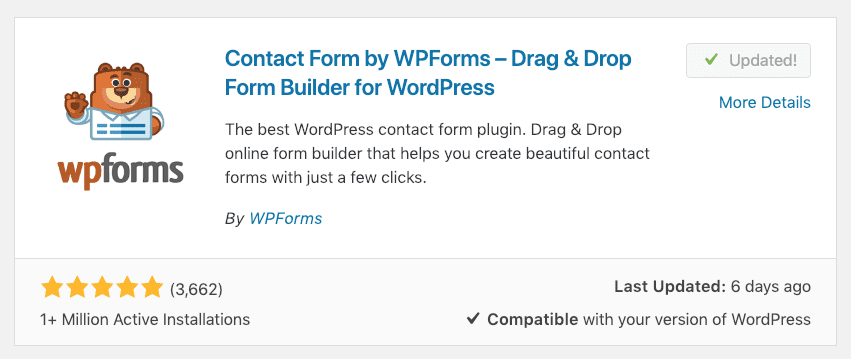
So, first, let’s head to your plugins library and install/activate the plugin called Contact Form by WPForms, pictured below:
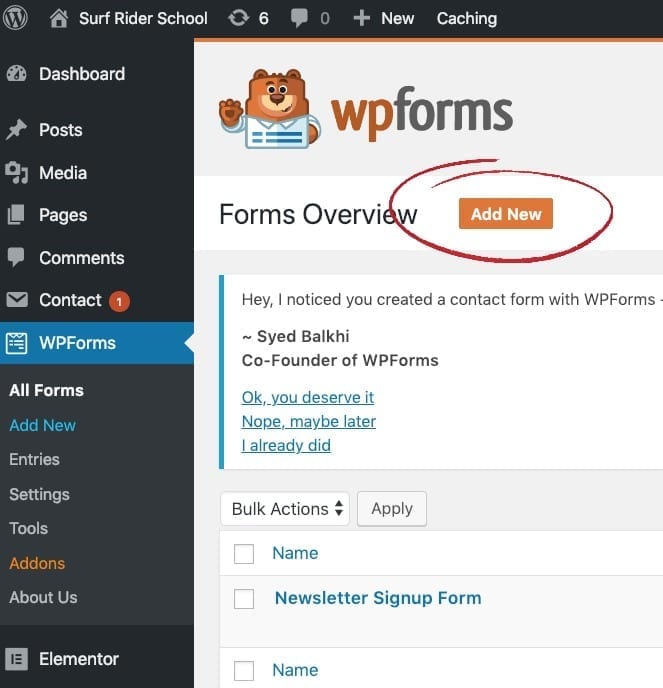
You will get a new WP Forms tab in your dashboard. In this new area of your dashboard, click Add New.
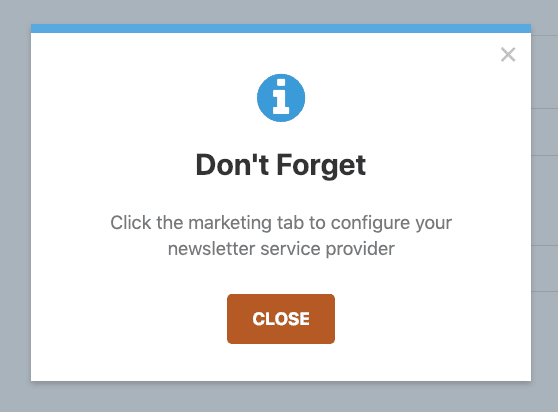
You’ll see this little popup. It’s just a thoughtful reminder from WP Forms. We will do this step later on in the tutorial. Click Close for now.
How to Edit and Customize Your Form
Okay, now we are in the WPForms Builder.
There are a million features you can edit. But I’d like to show you how to change two things to get you going in the right direction!
Let’s take a quick look at:
- How to change the Submit button text
- How to change the confirmation message
You can start editing by clicking on any part of the form you’d like to edit. For our example, click on the Submit button in order to change the Submit Button Text.
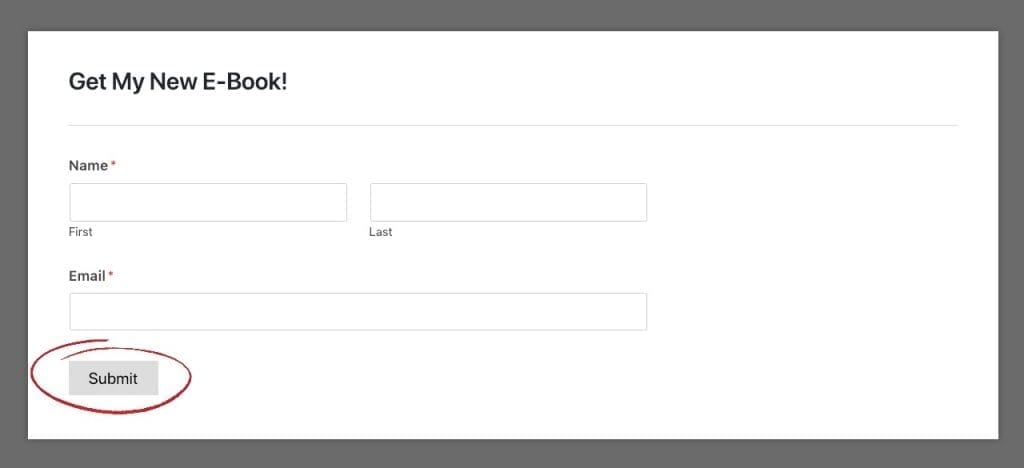
When you click on the Submit button you’ll get taken to Settings > General. If you don’t see the correct section, just keep clicking around, it took me a few tries 🙂
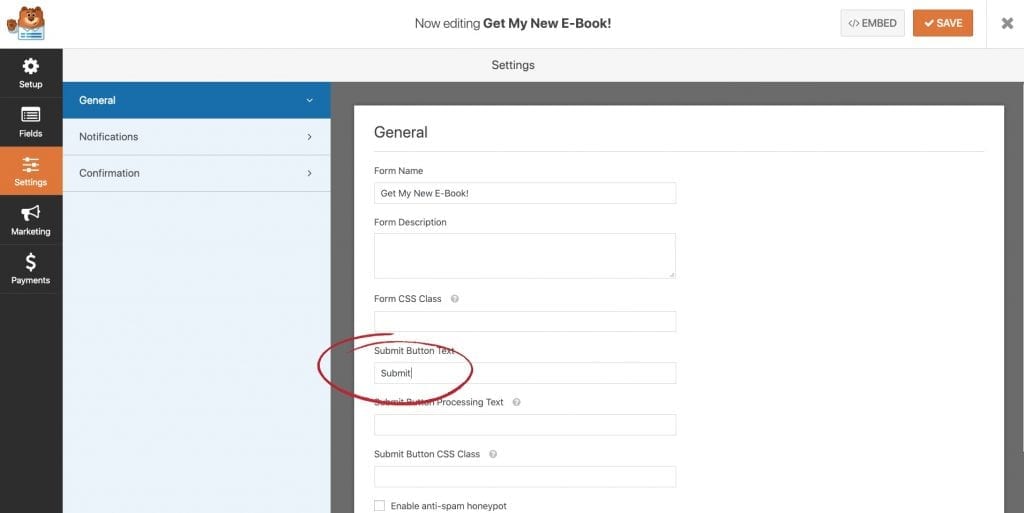
Once you change the Submit button text, keep on customizing! Click Confirmation on the left, and then change the Confirmation message that will display on your blog when someone completes the form.
Customization is key folks. Your new subs will notice the efforts.
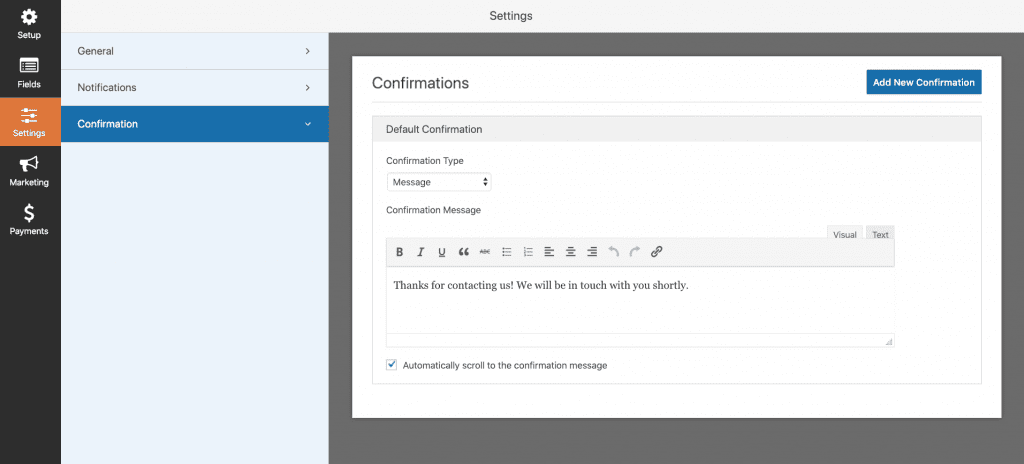
Nice work, you new email marketer you!
Then click back to Fields and try dragging in another field onto your form. Try a field like the Paragraph Text. Editing your form should feel just like using Elementor, Site Origin or another page builder.
Here’s a new form I just made as I wrote this tutorial! I’m letting the subscribe tell me which eBook they’d like to receive.
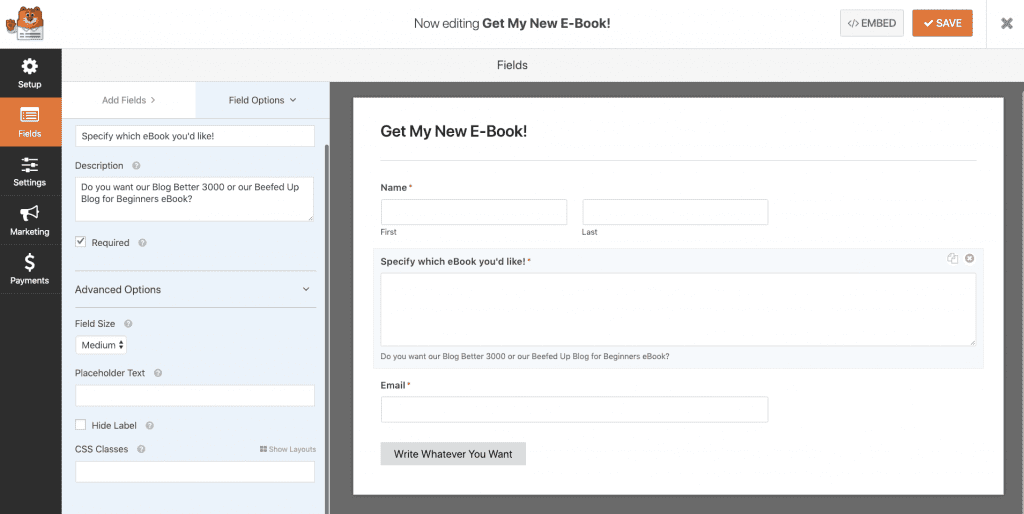
Once your form is looking good, just hit SAVE, then EMBED.

You’ll get your own custom embed shortcode for the form. We will drop this shortcode into a WordPress blog post or page in the Text tab.
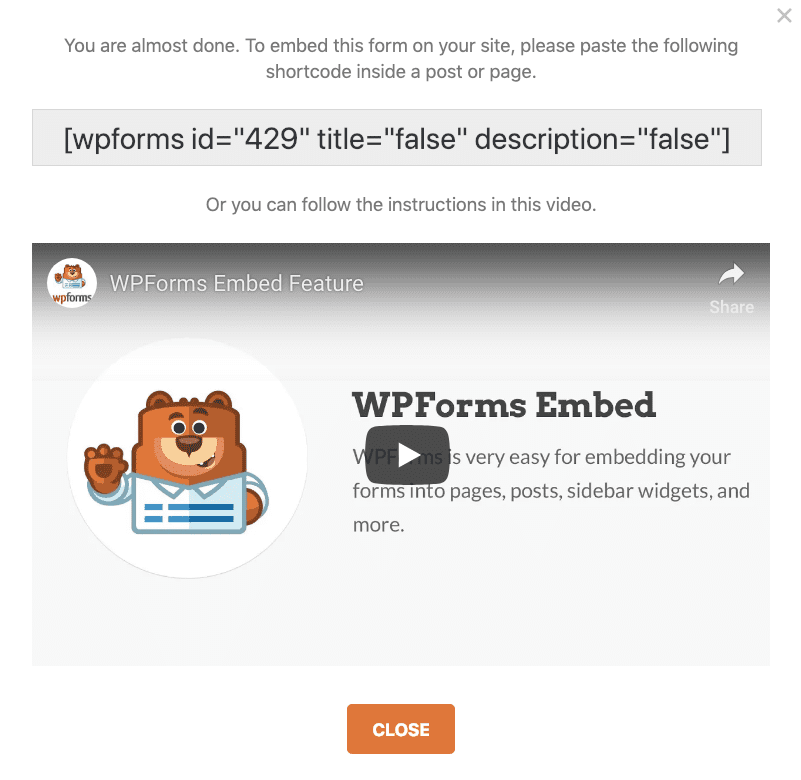
Go ahead and copy-paste that code into your WordPress site wherever you want, then save it, and you’re all done creating your first form!
This is the first and most important step to setup Consant Contact with WordPress, because you now have a way to collect emails! Good job!
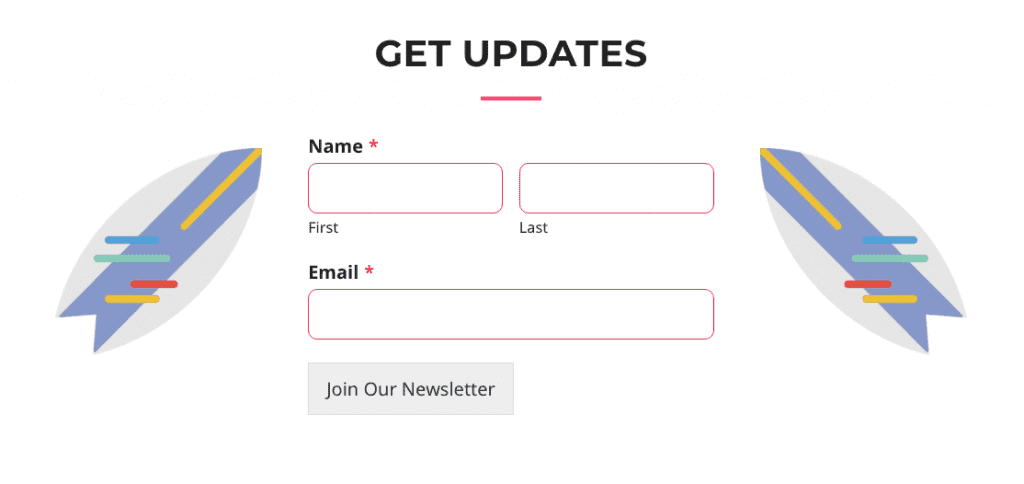
Here is an example of what our newsletter signup form looks, plus a few logomakr images added to Elementor, looks like at surfriderschool.com…
Step 2) Create a Custom Email Address (i.e. you@yourdomain.com)
As I mentioned above, all of the best email marketing providers including Constant Contact recommend you use a custom email address when you start email marketing. It’s not mandatory though, just best practice as you setup Constant Contact with WordPress.
We’ve been covering how to create a custom email address over on YouTube for years now, so I figured it’d be easiest to feature our best video on that process here.
Basically, the two steps you need to do to create a custom email address are:
- Visit HostGator’s cPanel, click on Email Accounts, and create a new address @ your domain.
- Head to Gmail, and setup POP3 import so you can send/receive from/to this address using your Gmail inbox.
It may sound complicated, but it’s really not. Plus, this is a process client’s will love you for if you can do it for them.
Video Guide: Setup a Custom @ Domain Name Email for Free
Here’s the video that’s helped hundreds of people learn how to create a custom email address. To be clear, there are a few ways to do it (many of which cost money, like paying GoDaddy to do it) but the way we setup your custom email here is the best free way I know of and it’s still how I create all my business emails.
It should take about 15 minutes time to make a custom email address ID with your domain name. Take another 5 to sync it with Gmail (covered in the video too) and you’ll be all set basically for as long as email is a thing 🙂
Step 3) Register Your Email Marketing Account
Okay now armed with your custom email address (or not, up to you either way works) it’s time to setup a basic email marketing account.
There are lots of good places to do this, like Aweber, Mailchimp and Constant Contact. Because we know it can take a little time to figure out how to get email subscribers, aka you need that free trial for as long as possible, we’ve negotiated a free 60-day trial at Constant Contact.
Constant Contact are in my opinion the easiest to setup (because THEY create a mailing list complete with a welcome email FOR you!) though the services at Aweber and Mailchimp are quite professional too.
If you choose someone else over Constant Contact, you can still use every other part of this tutorial with whatever company you choose!
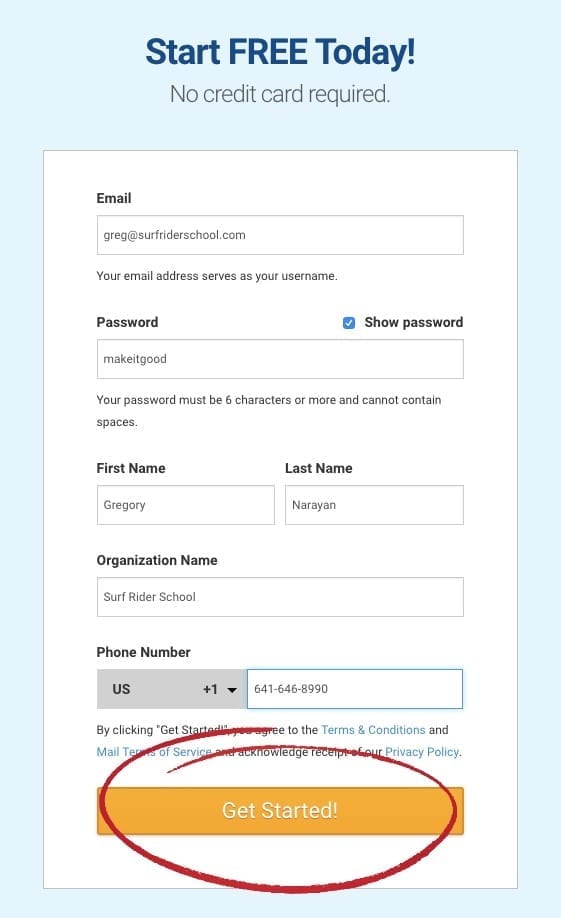
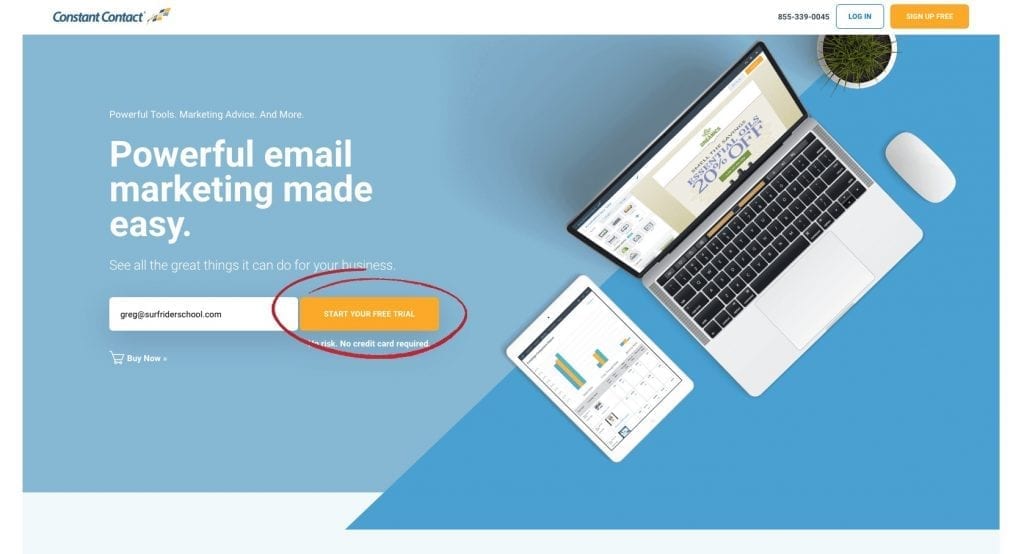
Of course for now, we’re going Constant Contact all the way! So, simply head over to our Free 60-Day Trial Signup Page at Constant Contact. No credit card needed today to setup Constant Contact with WordPress, you get all the tools for free.
Just pop in whatever email you use most for your blog or website needs, and hit Start Your Free Trial.
You’re almost there now. Pop in your basic contact details, then hit Get Started!
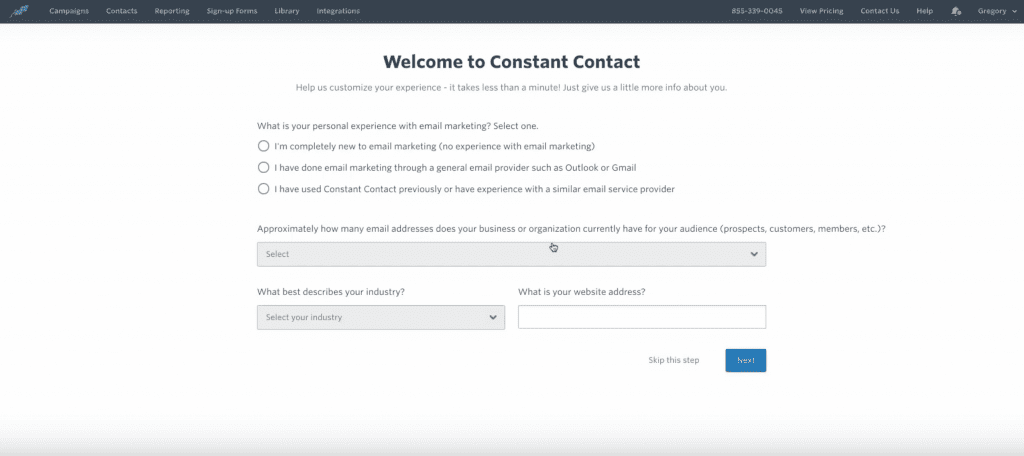
Next, tell Constant Contact a bit about you. They are a very smart service and can serve you better if they get to know you a bit.
Once you do that click Next.
Now there will be six boxes on the screen which you can use later on. These are all good ways to setup Constant Contact with WordPress, but we have a specific route in mind. To proceed, we actually just want to click Campaigns in the upper left corner.
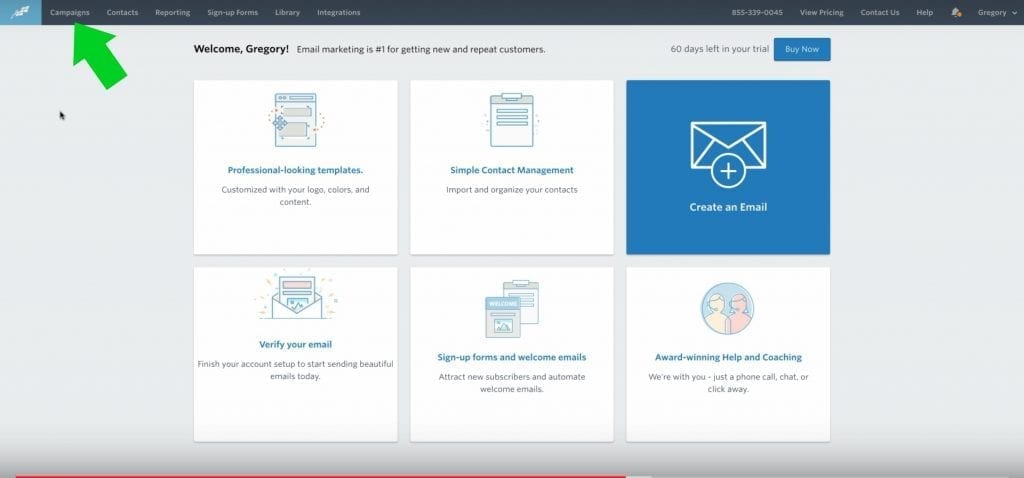
And voila, you’ve setup your welcome email! Or, well, CC did that for us actually. But you found it!
Now hopefully you are seeing how easy it is to setup Constant Contact with WordPress.

Step 3 is all done, you have successfully registered a Constant Contact account and can proceed to make it totally your own.
Step 4) Customize the Welcome Email
Alright now for the fun stuff. Click on Campaigns, then click More, and Edit the welcome email. If it asks you are you sure, just click Edit again.

There will be a demo on how to use the drag & drop email editor if it’s your first time. Should look something like this. I’d watch it, it showcases some cool features you might not think of.
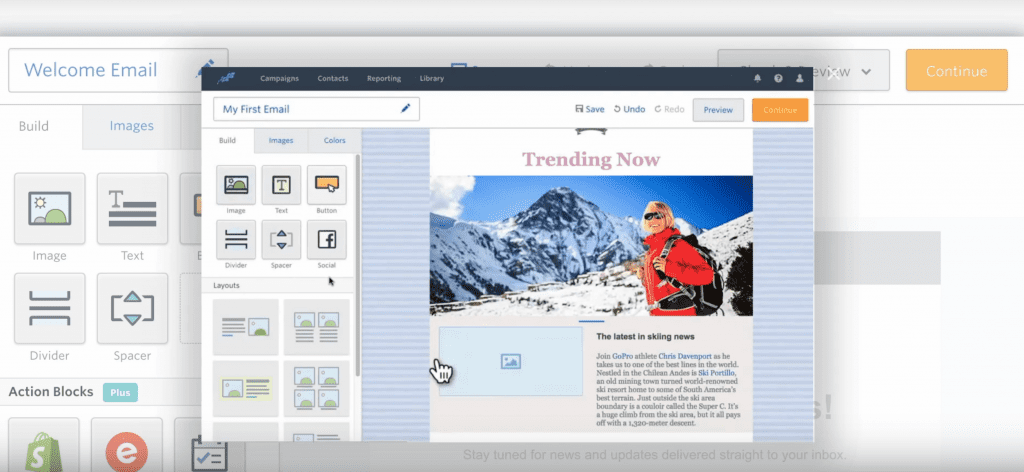
After you watch this little tutorial, go ahead and start creating!
I like to drag in an image, play around with a title or two, and add some text. Keep in mind you can upload almost any type of file into your welcome email – that includes images, videos and PDF ebooks!
To insert an eBook, simply upload the PDF file back in your WordPress media, then copy the link to the file, then paste the link into your welcome email. Your welcome email will do all the work for you. It’s really that easy to send an eBook automatically, while you sleep or travel or whatever, to new subscribers.
You Can Create Anything Here, Literally
Okay, bet you can’t wait to see what I made while blabbering all these directions! 🙂
Here’s what I made. BTW, it’s now time to click Save and Continue.
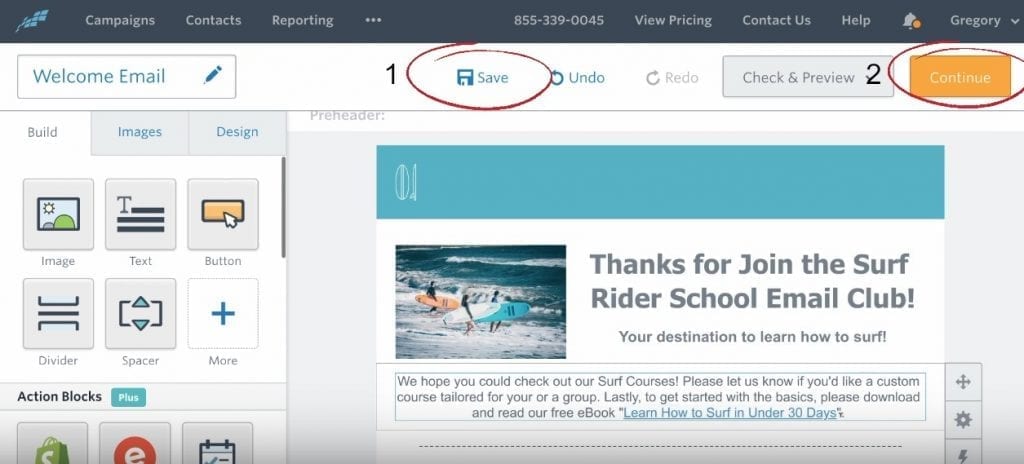
Just Gotta Verify Your Email First
The next screen is where you will Activate your email list, but this page can trip many of us up because we have not yet verified our email address with Constant Contact.
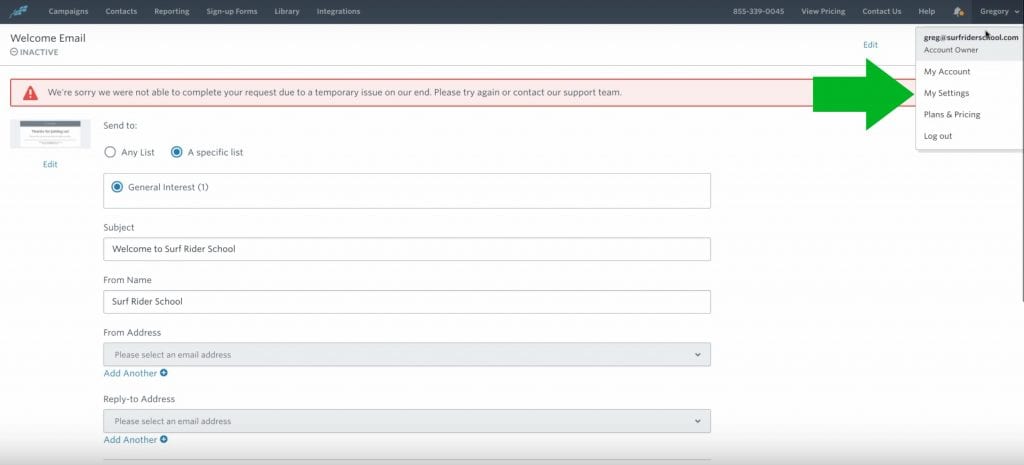
So, before you fill in this page above, just click on your name in the upper right, then click My Settings.
Next, click Verify Address at the top.
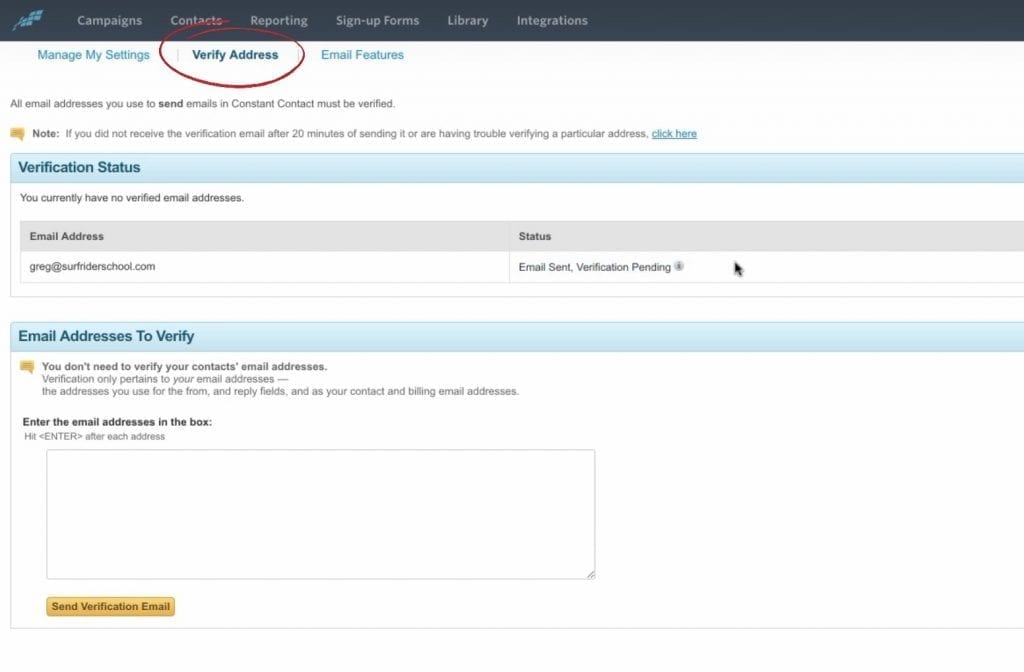 If it says “You currently have no verified email addresses” like it does above for me, then it’s time to head to your email.
Look for an email from Constant Contact. Once you find it, open and click Verify this email.
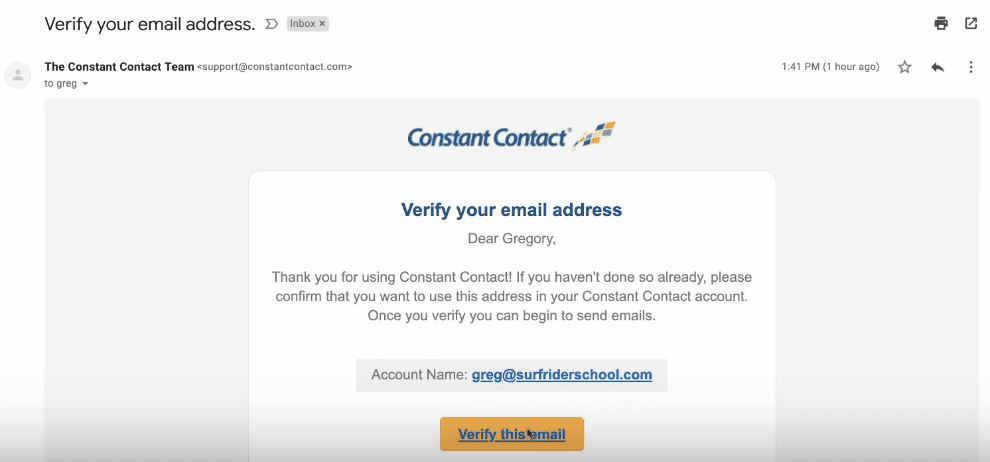
Okay with your email verified, you now must head back to the activate your account screen at Constant Contact.
Back in Constant Contact, click Campaigns, Edit, Continue.
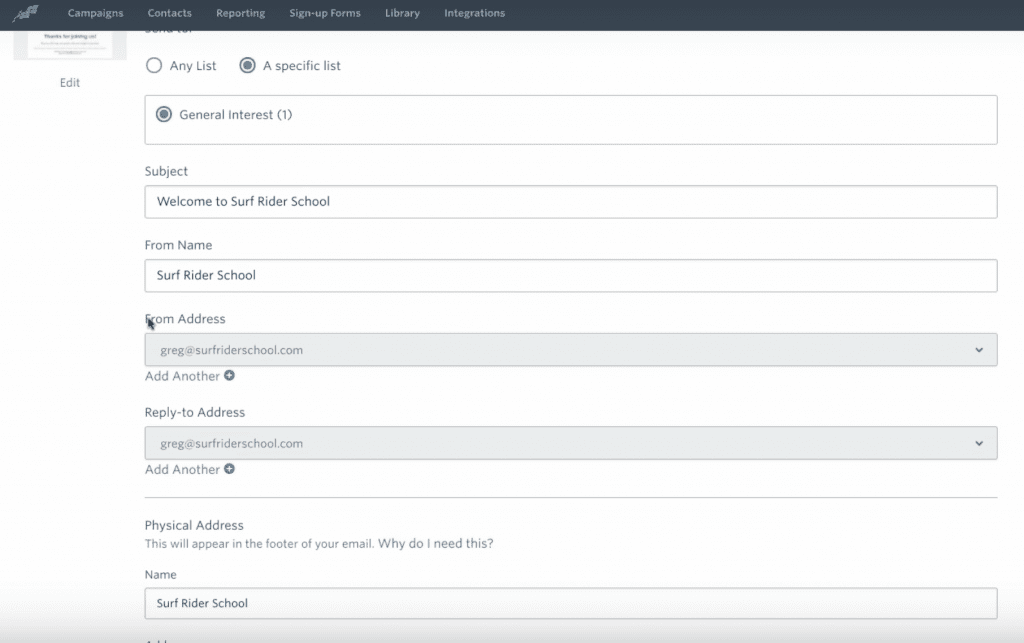
Once you are here below, click A specific list, then click General Interest. Choose a from name, then keep your verified email address in the from and reply-to boxes, then lastly, just pop in some physical address you manage. Then click Activate.
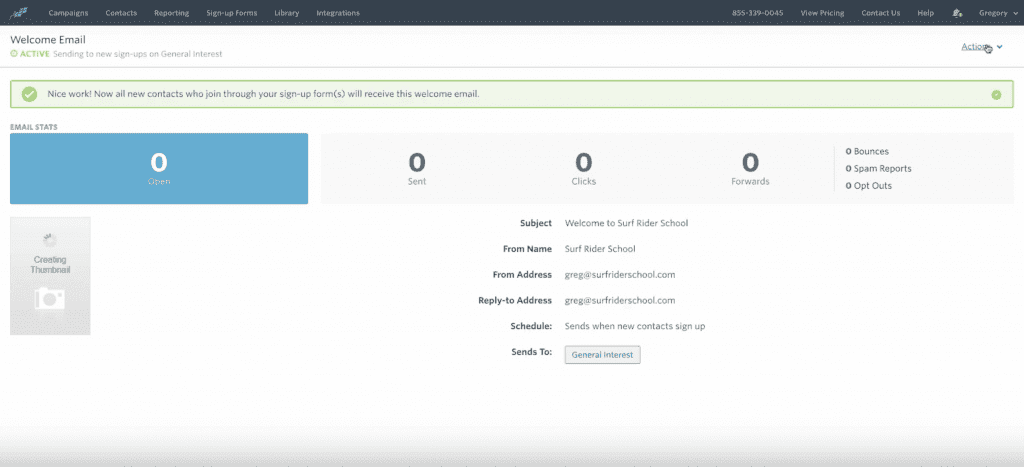
Hopefully it will work and you’ll see this screen. You are done with the setup at Constant Contact!
Step 5) Final Step to Setup Constant Contact with WordPress: Sync Email Account with WordPress
Lastly, in the final step to setup Constant Contact with WordPress we have to head back to WordPress and make sure your form from WPForms is connected to Constant Contact so when people use the form then join your list. Pretty easy.
Go back to your dashboard, WPForms, and click on Integrations.
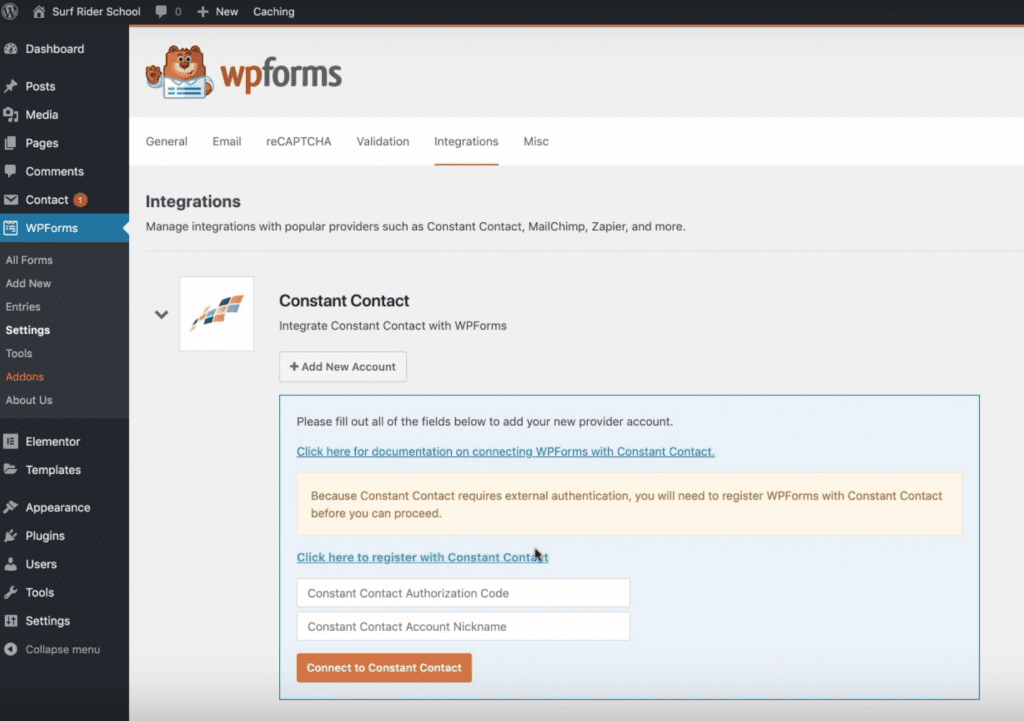
Then click on the Constant Contact logo.
Then click Add New Account. And then Click here to register with Constant Contact.
Then login in the pop up window.
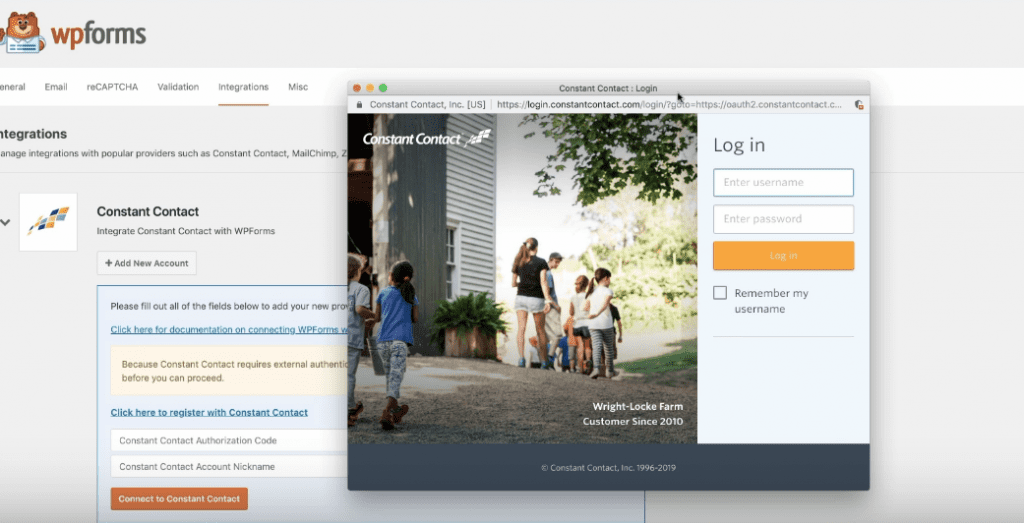
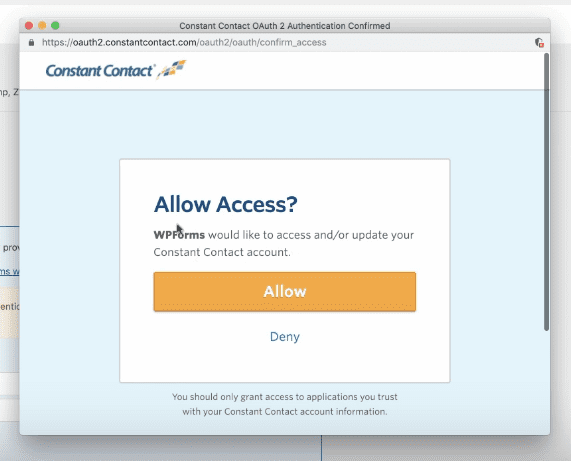
Click Allow.
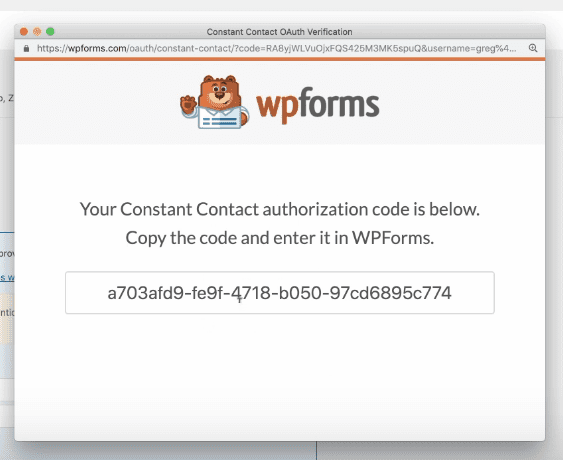
Then copy the code.
And paste it inside the WordPress screen where it says Constant Contact Authorization Code.
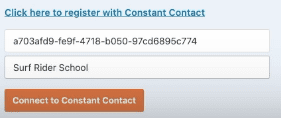
It should say Connected.

Lastly, you’ll need to click on All Forms. Then open your form by clicking on its name.
Then click Marketing > Constant Contact > Add New Connection.
Enter a connection nickname.
Then just choose the available form fields. All you have to do is make sure Email is selected for Email, Name (Full) is selected for Full Name, Name (First) is selected for First Name, and Name (Last) is selected for Last Name.
Then click Save!
Now, finally, you’re all set! When people pop in their name/email address in your form, they’ll get signed up to your list, and will subsequently get your welcome email! Your process to start a successful email marketing newsletter is under way!
Conclusion: Welcome to Email Marketing!
You’ve heard so much about it, and now you’re right in the midst of email marketing!
Did you enjoy the process to setup Constant Contact with WordPress? Want to tell us about your newsletter or email course upcoming? Get stuck? Let us know where you’re at in the comments! Talk soon! ~ Greg



Hi thanks for sharing this wonderful information, I am new to email marketing and wanted to know more about that, your post explained me everything appreciate your efforts behind the post.
Thank you so much for sharing and to keep your point in the post.
Happy to help Amara
Hello there!! Thanks for this information.
No prob!
Greetings,
I am Steve. I’m interested in advertisement.
I wanted to ask do you publish sponsored posts on your website? And, if you do, how much do you charge for such service?
Hope to hear from you soon!
Regards,
Steve
Very great information in this article!!