


What’s the first thing you should do after you setup a blog?
Hint: Most people forget to do this and get less gigs, less sponsorships, and less feedback on their work because of it.
Experts will tell you to create a Facebook page and “get active” online or even try advertising.
I might tell you to write one welcome post and two more showcasing your niche expertise.
There’s honestly a ton you could do. But with little resources, a small budget, and no credibility (yet) how are you supposed to make any sizable dent?
You need to make your brand air-tight with tools readily available at your disposal, and you sure as heck need to network.
That’s why you need a personal email address.
4 Reasons You Need a Personal Email
Sending from a personal email address instantly shows people you’re clever and good with technology. Afterall, if you’re smart enough to have your own email, what else can you create?
You email address can actually attract you leads. I mean, would rather connect with someone at a personal email, or an “admin” email?
It’s a good way to jump ahead of other bloggers in your niche.
Further, a personal email is way harder to fake than a Gmail these days, which makes it verify your identity.
Lastly, people are more likely to remember you. A quick email is often the first “time” someone meets you, and many of us are conditioned to forget anything that comes before a “Gmail”.
Don’t be forgotten!
On the other hand, not setting up a personal email, can be very harmful. Can you imagine a credible blog or website you follow using a Yahoo address for all their email needs? It’s 100% unheard of.
Don’t be unheard of!
Time to Setup Your Own Company Branded Email
The setup here is pretty easy. But, I know I was totally confused by emails at first, so I really hope this helps.
In this tutorial you will learn how to:
- Create a recognizable email address like myname@mydomainname.com.
- Send from and receive to this new address from the comfort of your current inbox.
- Setup unlimited new emails for free.
This tutorial assumes you currently use Gmail as your homebase, but the steps will be largely the same elsewhere! If you do want some help configuring Yahoo or another provider, just let me know or write me an email.
What you need:
- A domain name and web-hosting. Don’t have these yet? I made an under 10-minute video on the setup here.
In this tutorial we are going to build an email address with the domain registrar. This is the easiest way (at least I know of) for bloggers and website owners to setup an email.
If you have a better/cheaper/strong/faster method, please tell us below!
We’ll build an email like this:yourname AT yourdomain DOT com/org/net
Who provides the email setup tool? The web-hosting space provides our email setup tool for free.
You can rest assured too, because all of these components (domain, hosting, email) will exist in the same place. That, for me at least, is a major headache reducer when I need to login and change any settings.
Note: There are lots of good options for registering a domain name and hosting and many offer free email services. If you have questions on specific providers, just ask. I’ve used a handful of them and can help you choose the best one, depending on your individual needs.
What you don’t need:
- Any sort of advanced knowledge of email address and configurations. The tools we’ll use here are simple and we’ll end the tutorial in our Gmail inbox.
- Any knowledge of coding whatsoever.
As I usually tell folks, if you can setup a Facebook account, you’ll be just fine. And if you can’t, then I hope you enjoy the roughly 1.5 more hours of free time you have than the rest of us 🙂
Part I: Decide where you’ll make/host your new email
The first step in creating your own email is to decide where you’ll make the darn thing. No, you can’t just write a custom email in Gmail or Yahoo – these always have the “gmail” or “yahoo” in there.
So you email in this is unique, but not personal.
Again, several good options.
You could get a personalized email from the company you work for, for example, yourname@company.com. Phone companies also give out email addresses like yourname@tmobilemail.net.
You could also use a third party service that only specializes in email. This might be comforting for you or allow for interesting email features like A/B testing or a whole new inbox.
However, when I Googled around I noticed some 3rd party email services charge pretty significant amounts just for the email address (no domain name and hosting space included).
You could even manually create a few databases with a tool like Microsoft Access, setup an ISP, and fire off emails from your own personal computer.
The downside here is the database would be using storage on your computer, not the 15 GB we get at Gmail. Still, an option that may suit some.
Personally, I like the basic Email Accounts tool at HostGator. You can create unlimited new emails for free and setup it up so you control everything from Gmail (see step 3 below).
It’s just an email setup and forwarder, with a crap-ton of storage space, and I don’t need much more in this case.
Plus, I use HostGator’s Email Accounts to setup emails for clients I do business with. Throwing in a custom email after some consulting work is complete is a nice touch, and often makes me look smarter than I am.
Of course, I don’t tell them how easy it is!
Note to your wallet: A domain and web-hosting these days costs you as little as $3.96 a month, and the email service we’re using here is included for free. That’s one Starbucks coffee you skip each month, as I tell folks.
Success ain’t free (you know this).
But if you are concerned with cost as we all are at some point, I wrote down lots of ways to blog for money that can easily void setup cost. Who knows, maybe your personal email will land you a paying gig right off the bat?
Happened to me on my 4th or 5th try! Okay, moving on.
Part II: Create your name
So, here’s where the fun comes in. Think of it like this – for any domain name you can make, you can create any email matching that.
As much as I’d like it, I can’t create “greg.com” but I could create gregtheblogger.com, then make my email addy something like greg@gregtheblogger.com.
Still with me?
Here are some things to consider as you launch your first personal email address:
First name is a safe bet. It’s personal enough without being weird or confusing in any way.
Depending on your business, you could setup an admin, support, contact, or some other email with a more clear purpose. This helps the sender tailor their message and hides your personal details.
Try to make something people enjoy writing in their emails.
Especially if you are posting an email on your site, making it aesthetically pleasing goes a long way. I’ll never forget the first blog sponsor I worked with. Their email was SethandBarry@honesttea.com and as I wrote my note I picture the owners opening up a crisp letter on their porch as they enjoyed Honest Tea. I wrote a really inspired letter because of it, and we did business together for about 5 months.
Above all, keep it simple. You want people to remember this email. I would use no more than two words ahead of the @ sign, and no dashes or numbers. You just don’t need ’em.
I hope that helps your brainstorming. As usual, if I’ve missed any key pointers in this stage just drop them in the comments and I can update this post or link to a comment.
You know I love referencing comments!
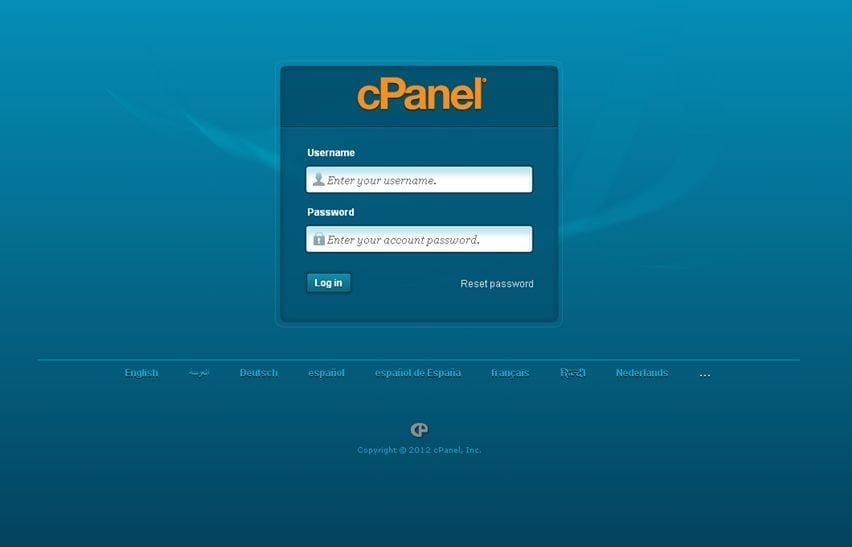
Part III: Time to setup the email (we’ll use HostGator)
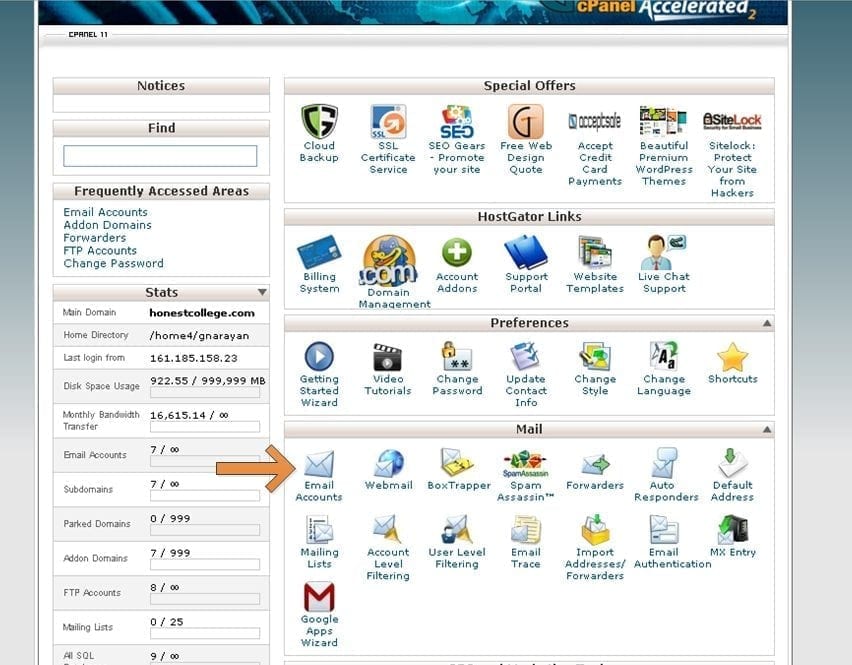
Okay, login to your cPanel then find the icon for Email Accounts in the mail section.
If you still need a domain name and hosting, make sure to read my first Ultimate Guide. I’ve set that link to open in a new window so you can read both guides alongside each other if you want.
This part is pretty straight forward, but I know how annoying ANY email difficulties can be, so I’ll walk you through all of it 🙂
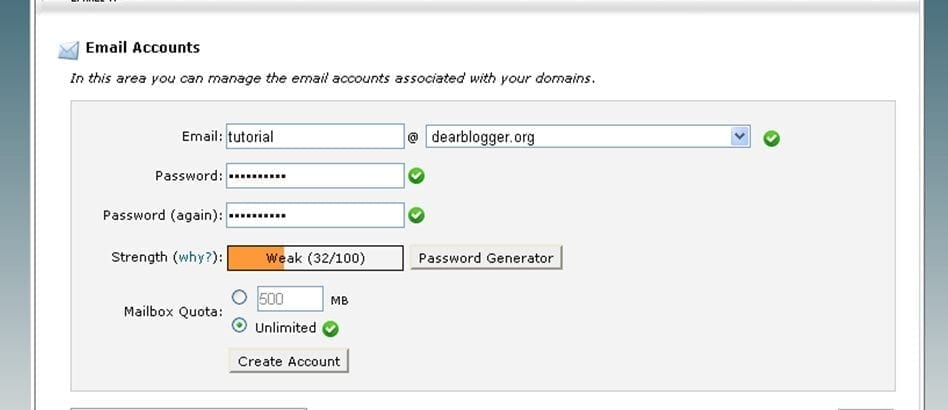
Great, we’ve just setup a new inbox and email address using HostGator. But, who really wants to log into their cPanel just to check email?
Not I.
So, in the next step we’ll setup a forwarder so anything sent to your new address goes to your current inbox, in the case here, your Gmail.
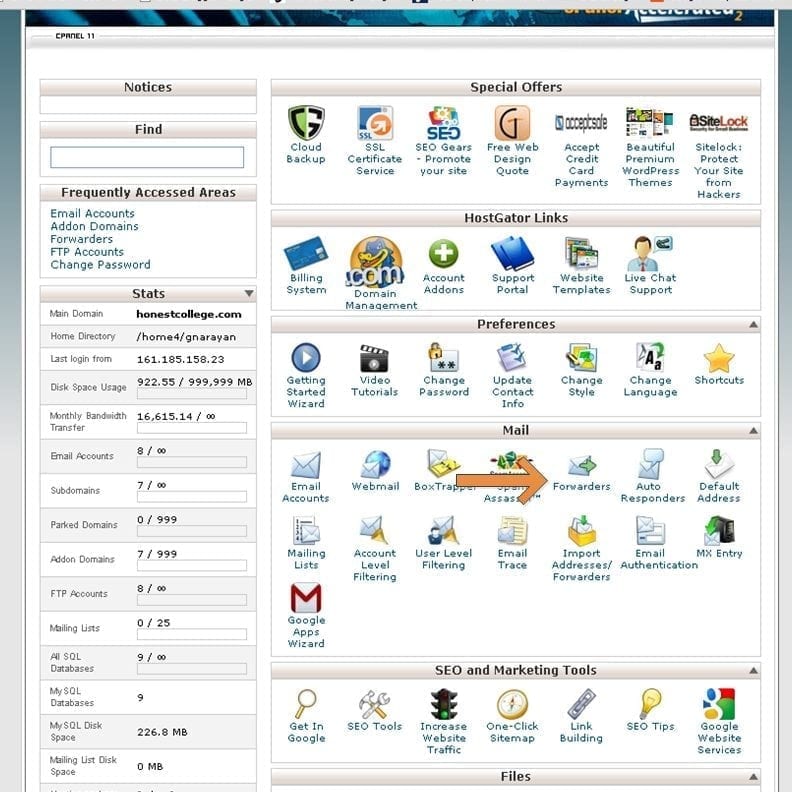
Part IV: Forward incoming emails to Gmail
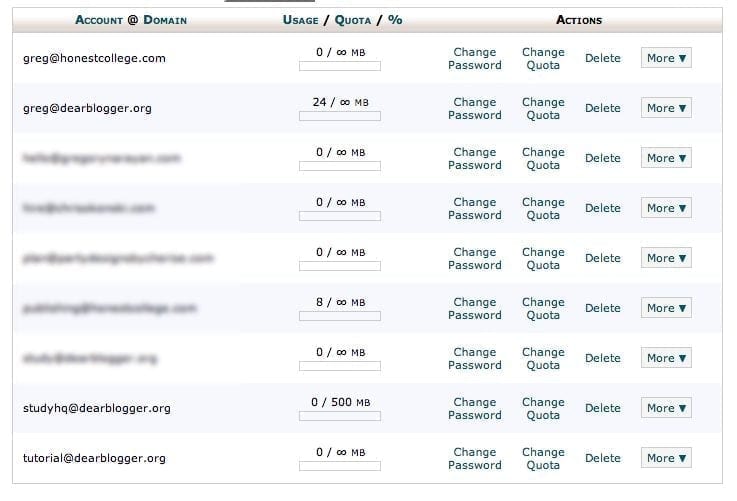
The tool we need to find here is called “Forwarders” and it’s in the same section where we went in Part I to create the new email address.
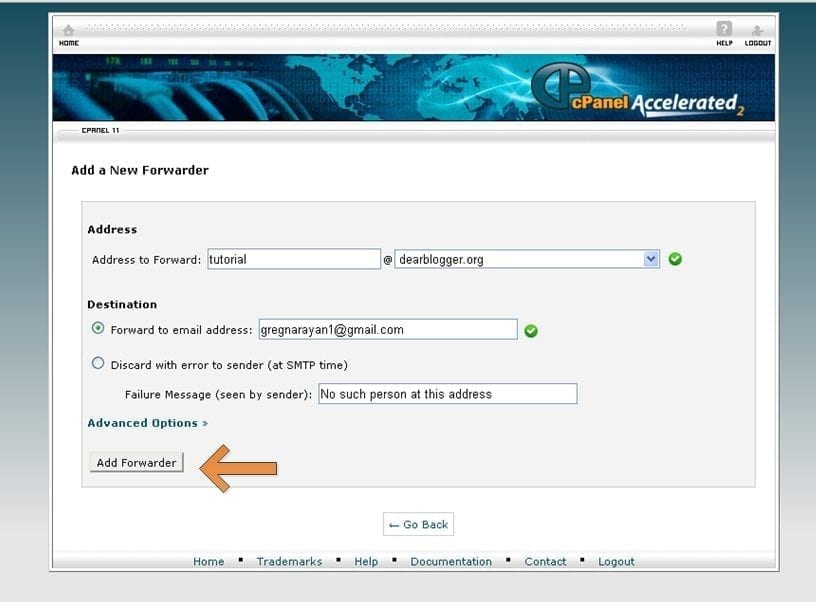
As you can see, I’m forwarding all emails to “tutorial@dearblogger.org” which we just created, to my Gmail address.
No spamming me!
That’s all you need to do here, and we’re actually done at the cPanel once you hit “Add Forwarder.”
If you were curious, HostGator will store a copy of emails in their storage units. So, if one day Gmail blows up and loses everything, unlikely as that is, you’ll have a back up plan and won’t lose those cute emails from your mom.
Part V: Sending from your new email address
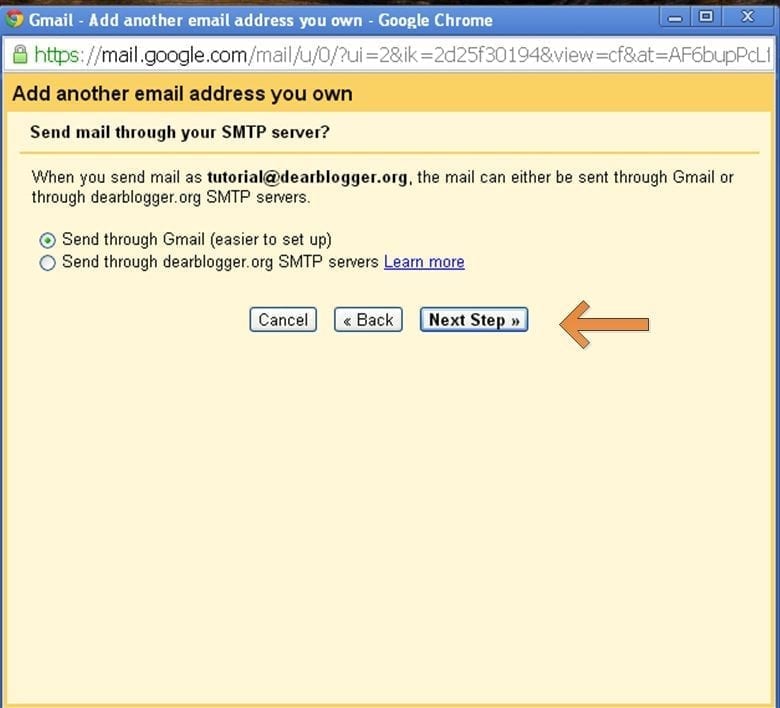
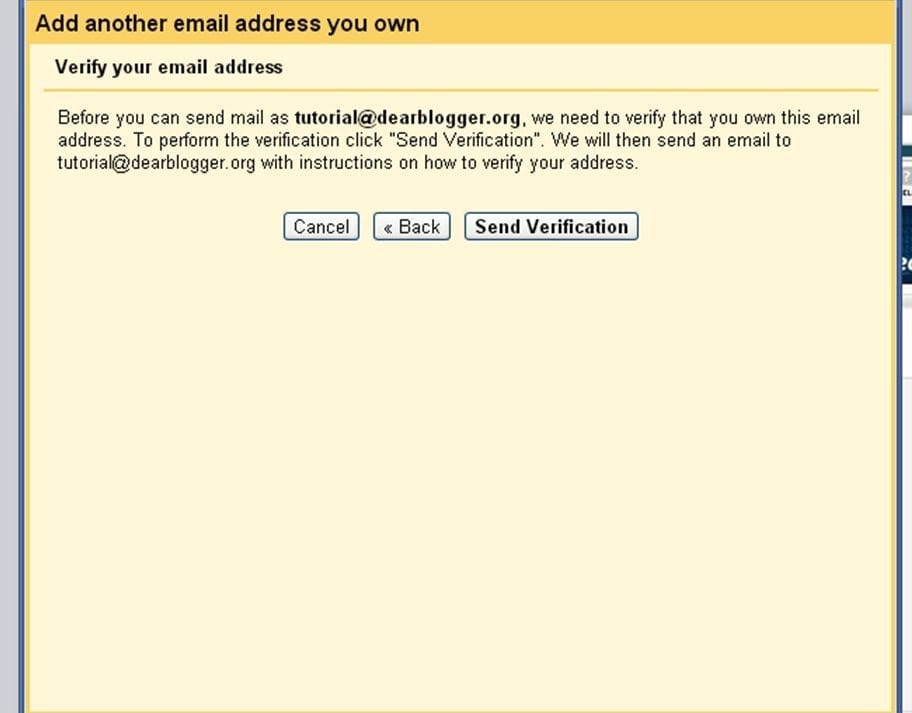
Okay, so our new email address is created and anything sent to it will now go to Gmail. But we still need to verify the address with Gmail so you can actually send emails using it.
Let’s take a look at how to send from tutorial@dearblogger.org.
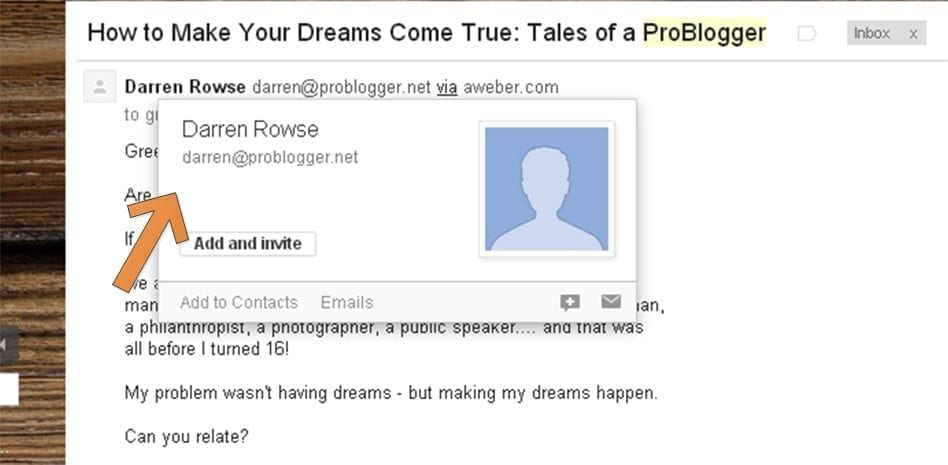
Head to Gmail, and click on the gear icon in the upper right hand corner (crossing my fingers Gmail doesn’t change their layout after I publish this, but I think we’re good).
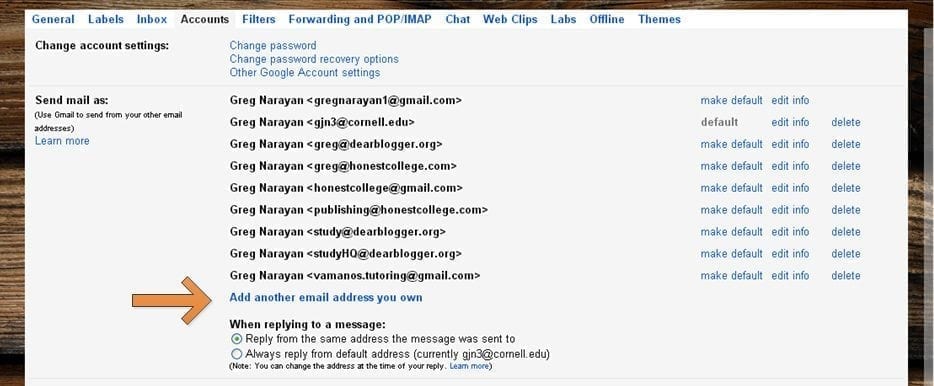
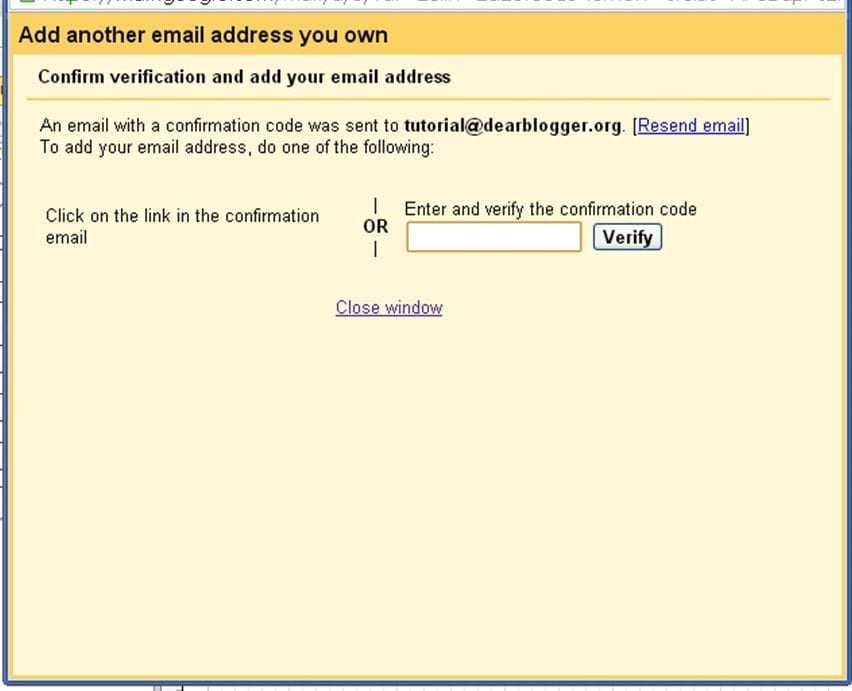
Adding a new email address you own will open up a series of pop up windows. What you need to do here is prove to Gmail you own this address, in our case tutorial@dearblogger.org.
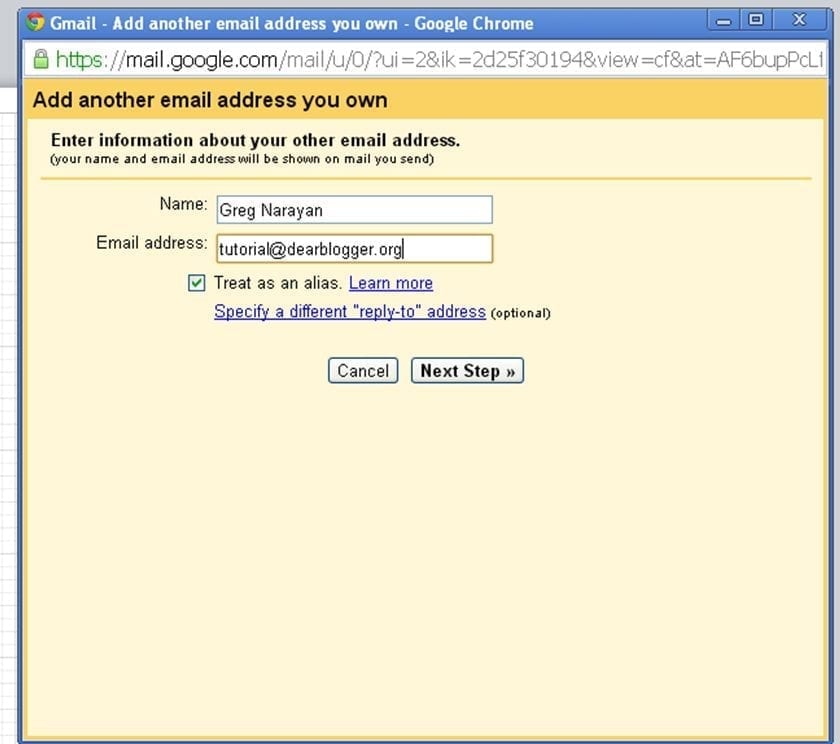
Just follow the instructions Gmail provides.

That’s it! You now have a personal email representing your domain name which is fully configured to use from your Gmail account.
Neat, huh?
I’d go ahead and make it your primary address now, and add a signature to it. When I get a chance, I’ll include those sections here as well!
Part VI: Setting your primary email
Coming soon! Check back during your next coffee break.
Part VII: Creating the perfect email signature
Coming soon! Ditto.
Conclusion
As I stated in the year 1 recap, the comments here have been a big pro for many, many reasons (thanks).
So if you have a testimonial or story from email networking, drop it in the comments. Many of my readers have also finally come around to setting up a domain and hosting – those stories welcome too!
Let’s make this guide really “ultimate” so everyone can send emails that hit the target with their results.
More soon…