Congratulations to the winners of our Flatsome Theme Ecommerce Website Giveaway Contest!
Welcome Guys! Today I’m super excited to show you how to create this online store website because I think it could be our best website yet! Our quick and easy Ecommerce Website video teaches you the best features from 2015-2018 and some new features like video sliders, as-featured-on logos, testimonials, newsletter pop-out, a new visual editor through the UX Builder, social icons, payment icons, parallax images, high resolution responsive design, and more!
You’ll of course also learn how to setup real payment processing so you can accept payment with credit card, debit card, PayPal and more options from anyone around the globe. We even cover shipping and sales! So many great online stores like these use the easy methods we’ll cover today and I want you to too!
Lastly, because I don’t want you to feel alone when you launch but instead what to give you guidance through your first year, I brought in my friend Andrew from fatherfigure.co to give you real advice on how to find customers and survive with your online store.
Andrew quit his full-time job at Google (I know, I’d do anything to work there!) to run Brooklyn, NYC’s hottest Daddy shop from home. Despite the crazy day to day (which we’ll hear about!) he somehow has the time to guide us (see notes below the video) on everything from domain names to legal discussions to holding your first T-Shirt.
If you’re ready, so am I, let’s create an online store website than can change your life forever! Firstly, let’s get everyone on the same page (open your laptop, head to the YouTube video, get delicious beverage within arms reach) …and now let’s begin!
![]()
Introduction: Learn The Steps and Costs to Making a Successful Ecommerce Website
What does it cost to create an online store website? Well it’s not free but that doesn’t mean it’s expensive either. Considering average developers charge upwards of $2500 (to make you a WordPress website, most of the time!) this is pretty awesome, in fact! You’ll also learn how to maintain your ecommerce website to save even more money later on.
You can make your new WordPress online store website in 6 steps:
- Domain Name – $15/year
- Hosting – $10/month
- Install WordPress – FREE
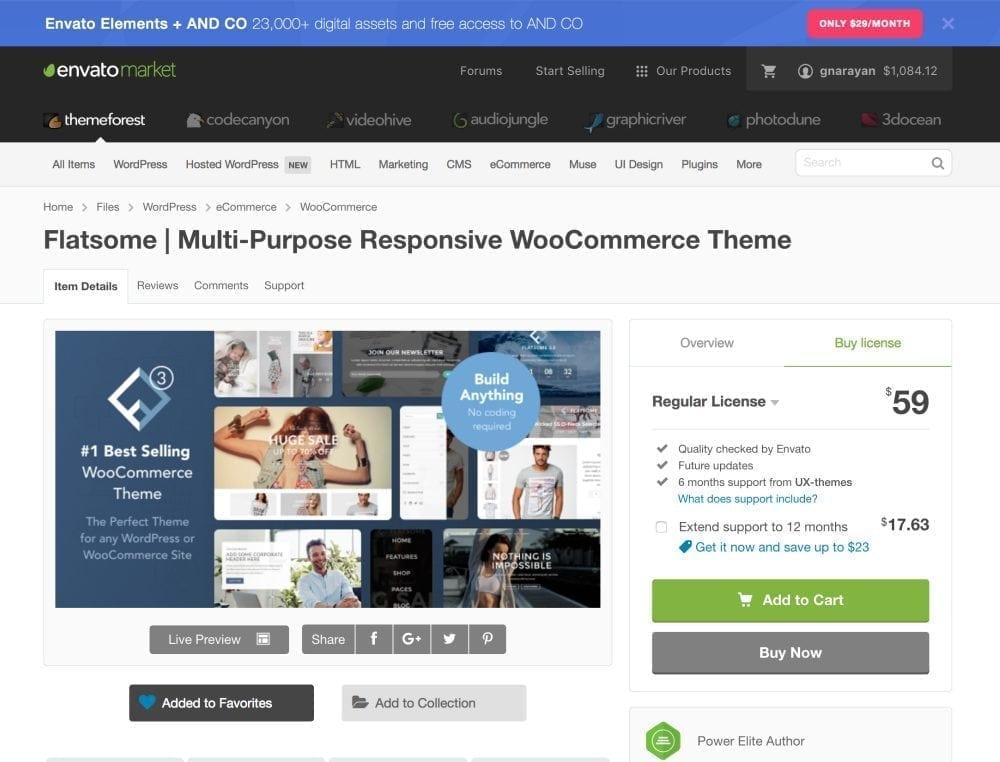
- Install Theme – Flatsome Theme $59 (#1 eCommerce theme, optional)
- Install WooCommerce (#1 software for a quick eCommerce website solution) – FREE
- Create Your Online Store – FREE
We have a discount coupon you can use – BigBonus – so it’s under $20 to setup your website! 🙂
Just watch the video and follow each step!
Affiliate Disclosure for this Blog Post and Tutorial…read it or not, just know that it’s here to explain why we use the products we choose! We may earn a commission from HostGator or Theme Forest which helps our business grow and in turn helps use create more free lessons for beginners. We could use any Domain, Hosting and Theme Provider on the planet to create this ecommerce website tutorial, however our goal is to make you the best possible online store with the best tools available as of June, 2017 so I’ve decided to use the products that I believe to be the best at the moment, which I use and trust myself on my blogs and websites. On a few products is possible for us to earn credit for referring you, which is income we put back into making our business bigger and better (which usually means more helpful!) We’ve clearly labelled all product links so you can choose to give us credit or not! We would never risk your trust over an affiliate link. Either way, it’s great to have you, and we’re confident after years of building with and hearing from you that we have brought you the best tools and now the best eCommerce website ever. All help we provide is free, always, as it should be.
![]()
First Section: Complete The Web Development
Let’s start building! All you need to get started is a computer, a high speed internet connection, and your credit card handy to pay the basic costs.
Domain Name & Hosting
To register domain and hosting, visit HostGator.com, choose Web Hosting, under Hatchling Plan click Sign Up Now!
You are now in the HostGator Order Form! Good job!
- Choose Register a New Domain if you do not have a .com (or .org, .net etc) yet or choose I Already Own This Domain to use a domain name you already purchased.
HostGator is an excellent domain name registrar, if you need a domain name, and we’ll get a discount below! Uncheck the Add Domain Privacy Protection box.
Enter your domain with the .com part too, then it will say “Added Primary” - Choose a Hosting Plan. Hatchling. Select Billing Cycle. My first ever order was for 12 months but 1 month is okay too. It’s up to you! Enter username and security PIN, not very important.
- Enter your billing info. Choose Credit Card or Paypal.
- Uncheck all additional services, you can add them later if you want! We’re on a budget people.
- Enter a Coupon Code. Use BigBonus for the largest possible discount. I earn a bit of credit if you use this coupon and it’s how I keep helping you guys for free.. thanks! 🙂
- Review Order Details. Here are some possible price scenarios! 1 month hosting w/ domain: $11.46. 12 months hosting w/domain: $59.69. 1 month hosting w/o domain: $5.47. 12 months hosting w/o domain: $53.70. When you compare this to the everyday items we spend money on, these are all good deals!
Notes: The additional services likes popping back in so you may have to uncheck it. Registering for a longer period up front and using my coupon will save you the most money long term. Back in my day when I signed up it was only 25% off. So, congrats!
Once you’re ready check the Terms of Service box, and click Checkout Now!
Install WordPress
Now that you’ve registered your new account at HostGator, you’ll get two helpful emails which we will now use to Install your WordPress website.
- Check your email inbox, just wait a couple minutes if you don’t see anything.
- Find email from billing and open it, this is one of those automated emails that’s actually very important!
- Click HostGator Billing Portal link
- Login with email address and password in billing email
- Click Hosting tab
- Click Get Started with WordPress Today (it now redirects you to a new WordPress install page called HostGator WordPress Installation Marketplace)
- Select your domain, leave directory blank, then click Next
- Enter in your basic information, most importantly your admin user (this is your username to login to WordPress, and your author name when you publish a post) You can change everything else later on.
- Check Terms of Service agreement box
- Click Install Now!!
WordPress will do it’s thing – no coding needed – and you will get your own copy of WordPress.org freshly ready on your domain and hosting. Let’s change your password now. Leave this screen open (if you close it then the sky will fall…no just kidding it won’t, but I like keeping it open) and wait about an hour for your WordPress site to start working.
While you’re waiting, it’s time to check on your nameservers. A nameserver is used to connect your domain name and hosting. Your own nameservers (you get 2 of them) are located in your other HostGator email from no-reply. Follow the brief steps below to make sure your domain name is 100% connected to your hosting.
 If you registered a domain name from HostGator: In your HostGator Customer Portal, Click Domains tab, click on the gear icon, make sure your nameservers match those in your no-reply email.
If you registered a domain name elsewhere, like GoDaddy for example: login there and follow the steps they will provide you.
Great job, take a break!!
![]()
Second Section: Learn The Web Design
The web development was pretty easy, wasn’t it? Well you can now call yourself a (WordPress) web developer. Learn a little code and you can be a full web dev. But you don’t need to know any code for now! Let’s proceed with the easy and fun process of creating your WordPress ecommerce website.
Easy n’ fun. Snoozin’ n’ treats. Peaches n’ cream. I think it’s too hot out for me. Let’s begin again!
Create Your Ecommerce Website
Login:
To login to your new ecommerce website, use the link from your cPanel Marketplace page or visit yoursite.com/wp-admin. Your username is what you chose before installing WordPress, and we just changed your password. If you don’t know your password, click Lost your password and WordPress will email you to setup a new one.
Install Theme:
Visit Flatsome on Theme Forest (or visit our Flatsome Affiliate Link to get the theme and give us credit) and have a look at it in all it’s glory. Buy one license, proceed with payment, then your theme will arrive in your downloads. Download the theme to your desktop!
In WordPress click Appearance > Themes > Add New > Upload Theme > Choose File > Find your theme’s .zip file > Open > Install Now > Activate.
Now it’s time to visit the Setup Wizard which should appear automatically. Go through all the steps in the video, and make sure to choose the Classic Layout! You can actually use any layout, it’s mainly just a matter of what you choose for your homepage, but we’ll keep it classic 🙂
View your site to see the changes. Nice!
Delete Plugins:
Your site will come with several default plugins, which we’ll delete. I want you to start on the same page as me so we know exactly how things are working on your end.
Visit Plugins > Delete the plugins we delete in the video
Add Plugins:
Any great site needs a few plugins to be a greater site. WordPress doesn’t know we want things like a Facebook login by default, but amazing people in the WordPress community have made plugins which have become cornerstone components of the greatest sites. I’m here to help you choose the right plugins.
Visit Plugins > Add the recommended Flatsome plugins shown in the video
Add Woocommerce:
This just deserved it’s own section. Once added, follow the setup wizard to setup pages and payment methods.
Delete Pages:
We don’t need several pages from the demo content or the sample page. Send them to the trash.
Modify Page Titles:
Some pages should be called other names because it’s more clear with common web standards and user experience expectations. This part is super easy. Follow the video to modify page titles.
Establish Which Page is Your Homepage:
Now it’s time to decide which page is our homepage. We will establish this page as our homepage. Go to Settings > Reading and where it says Front page displays, choose A static page > Front page > Classic Shop. You can easily set a different style page to your Front page here too, like Cute Shop, for example. In the future it’s totally up to you.
Visit your new homepage by visiting Pages > Classic Shop. Now follow the video guidelines to remove unnecessary rows and content. You are creating the backbone for your beginner ecommerce website, which will make it much easier to add beautiful content. Great work!
Create Menus:
Navigate with your mouse to Appearance > Menus. Remove items like FAQ and follow the video guidelines to setup the proper menus. Believe it or not this is a big step in the overall user experience (UX) of your site. Make sure to Save Menu.
![]()
The Fun Stuff on Your Ecommerce Website:
Designing the 7 pages, including a blog, that will compose your website. We’ll start with the homepage – it’s the first thing people often see, and feels great to complete!
You can now Download All Images we’ll use to make a gorgeous online store come to life.
Homepage:
There are 10 sections to our homepage which we’ll design top to bottom. First, however, it’s important to adjust the primary and secondary colors of our website which we’ll use often.
Go to Appearance > Customize > Style > Colors
Our primary color is #006FA8 and our secondary color is #DF62FF, these are both real colors taken from our slider-image-1. Be bold with your colors!
Hey Guys! See any misteaks? Let me know. Think I found one! 😉
Slider
The slider on your homepage consists of 4 banners. We’ll replace each banner, and change the heights and text. Note that you can also change the text and button colors to Primary, Secondary, White etc colors.
Click on the blue space to bring up the Banner settings
Change layout height to 700px
Change Background image to slider-image-1
Change Size to Original
Click on the text of banner 1 and paste in
<h1 class="h-large uppercase"><span style="font-size: 160%; color: #006fa8;"><strong>bring a friend</strong></span></h1>


<h3 class="uppercase"><strong><span style="font-size: 100%; color: #006fa8;">they save | you get cash back</strong></span></h3>
The buttons for banner 1 are Learn More (linked to Deals page) and Shop (linked to Shop page)
Click Apply > Update
Click to banner 2
Change Background image to slider-image-2
Text for banner 2 is
<h2 class="alt-font">A Walk Through Paradise</h2>


<h1 class="uppercase" data-animate="fadeInLeft" data-animated="true" data-animated="true"><strong>Brooklyn to</strong></h1>


<h1 class="uppercase"><strong>bay area</strong></h1>


Lightweight silk and cashmere gowns.
The button for banner 2 is Browse Products (linked to Shop page)
Click to banner-3
Change Background image to slider-image-3. This image needs to be flipped, follow video.
Text for banner 3 is
<h2 class="alt-font" style="text-align: center;"><span style="color: #ffffff;">Mens Clothing</span></h2>


<h1 class="uppercase" style="text-align: center;" data-animate="fadeInLeft" data-animated="true" data-animated="true"><span style="color: #ffffff;"><strong>sexy sunset styles</strong></span></h1>


<h3 style="text-align: center;"><span style="color: #ffffff;"><strong>From $45</strong></span></h3>
The button for banner 3 is Shop Now (linked to Shop page)
The fourth slider image will be our Video Background.
Scroll down to Video and paste in a YouTube video ID. Paste the ID only. For the demo, we used “UU8l62_LHPk”
Scroll up and in Layout change height to 16:9.
Note: the video will now be full width, great job! If you’d like to adjust the video height, however, you’ll need to upload a hosted video and upload your own .mp4 video to WordPress.
Hey Guys! Is this section missing steps or ______? Let me know I’ll give you credit! 😉
Mission Boxes:
Add title, change text to “our mission for the whole world”
Get icons from logomakr.com
Make sure heigh is 100px or consistent
Create credits page and add all credits here
You can find all text to easily copy on makeawordpresswebsite.com
Browse New Arrivals Section: Adding Products to Your Online Store!
Add title, change text to “browse new arrivals”
It’s time to create products!
First let’s delete the demo products. If you want, you can keep them, and replace their titles and other info.
Creating a product in WooCommerce is easy: add featured image, title, descriptions, price, category, tag, and publish!
I like adding some serious products and some goofs, while always keeping the look clean and stylish
We can decide which products appear with a tag: featured
Products, posts and pages are created in a similar style editor. This is easy and fast to setup products — I know you’ll get the hang of it!
Hey Guys! Is this section missing steps or ______? Let me know I’ll give you credit! 😉
Featured Boxes
Add title, change text to “it’s the store with more”
Change Layout height to 180px
Set background images to featured-box-1, 2 and 3
Hit Apply > Update

Seasonal Sales
Add title, change text to “seasonal sales”
Click Add to Content button > Products on Sale
Now add a simple product like we did above in New Arrivals
To make a product on Sale! just give it a sale price, and Publish or Update it
We will also add Variable products here (different sizes, colors, textures each w/ different price)
Hover on Products and click Attributes
Add Size and save. Please follow the easy video instructions!
We have to change our product to a Variable product now, please follow the easy video instructions!
Large Banner: The Weekend
This section is a Banner
Click Add to Content button > Banner > Right preset (with the text centered and white button, 4th option)
Click on the blue area in the background to open Banner styles
In Background change image to weekend-banner
Click Overlay and drag the opacity to 0
Change the text as you wish. We use:
<h3 class="uppercase">the long weekend</h3>


It's right around the corner.
Be ready for it.
Button should read “shop weekend styles” and link to Shop page
Homepage Testimonials
This section is a Slider with 5 Banners inside
Each banner contains a text box with a testimonial inside of it
The idea is to create one testimonial, get the text perfect, change the image, then move on and copy it’s options for the next testimonial.
Please follow the video instructions.
Our Blog
Add title, change text to “our blog”
Pick some name relevant to your store title
You can simply get images from Flatsome demo http://flatsome3.uxthemes.com/
Blog comes ready for you to edit right away!
This section will fill itself in with blog posts, it will do the work for us!
Lower Promo Slider
This section comes last but proves that last is truly not least. In fact I think this Section could become a crowd favorite.
First click Add to Content > Add a Section
Don’t add anything just click Apply
Now add the image lower-promo-slider as the Background of this Section
Open the section, click Add to Section, choose Slider
Click on the middle of your new Slider where it says Add slides here > choose Banner > choose Box Right > hit Apply
You will have a huge blue space that looks like it’s covering your background image, click the blue space
Choose both Color and drag the slider all the way to the left (0). Repeat for overlay.
Add another Banner and repeat these steps
You can now add your own content and buttons.
Text we use:
<h2 class="uppercase"><strong>YOU, AND ECOMMERCE</strong></h2>


<h3>It's about time</h3>


My tutorials show you how easy and fun it is to create an online store and get involved in the world of eCommerce.
<h2 class="uppercase"><strong> DISCOVER</strong></h2>


<h3>New customers</h3>


Selling online connects your product to a market that's already shopping. Launch with style and confidence then sit back and watch.
Click in the center of the image to change Slider effects like transition.
Product Categories
This section appears by default our online mobile website store! But because it’s also your Footer 1, you can remove it if you want. It exists as a last reminder to keep shopping – have you seen this feature anywhere else on the web? 🙂

Footer
While we’re down here, we might as well make your footer. The bottom most footer is Footer 2 in Appearance > Widgets
To create some content for this quick ecommerce website footer we need to create Blocks then add them to your footer
Head to Blocks
It’s easiest to edit the blocks that came with Flatsome
Our blocks will include 1. The story of 2. How to get ahold of us 3. What customers are saying and 4. Our location
You can get icons from logomakr.com or fsymbols.com, just make sure to give credit where credit is due.
Please follow the easy video instructions!
Hey Guys! See any misteaks? Let me know. Think I found one! 😉
Header
Make a logo at logomakr.com, we love the Compass but there are 1000s of icons to choose from
Upload and add a Logo Image
Make sure to add credits to your Credits page
Newsletter, already works just change background and text
Add any social icons you like
Social media logins for Facebook and Google will appear by default on your WordPress ecommerce website, see my channel for how to integrate them!
Hey Guys! See any misteaks? Let me know. Think I found one! 😉
Credits
If you choose to use the 4 icons on the homepage and the logo all from the video (5 total) here are the credits from logomakr.com you need to include somewhere on your website. Easiest way is to copy/paste them into your “Credits” page! 🙂
Nature graphic by <a href="http://www.flaticon.com/authors/madebyoliver">madebyoliver</a> from <a href="http://www.flaticon.com/">Flaticon</a> is licensed under <a href="http://creativecommons.org/licenses/by/3.0/" title="Creative Commons BY 3.0">CC BY 3.0</a>. Check out the new logo that I created on <a href="http://logomakr.com" title="Logo Maker">LogoMaker.com</a> https://logomakr.com/7OFK5c7OFK5c

Coins graphic by <a href="http://www.flaticon.com/authors/freepik">freepik</a> from <a href="http://www.flaticon.com/">Flaticon</a> is licensed under <a href="http://creativecommons.org/licenses/by/3.0/" title="Creative Commons BY 3.0">CC BY 3.0</a>. Check out the new logo that I created on <a href="http://logomakr.com" title="Logo Maker">LogoMaker.com</a> https://logomakr.com/99fTmJ99fTmJ

People graphic by <a href="http://www.flaticon.com/authors/freepik">freepik</a> from <a href="http://www.flaticon.com/">Flaticon</a> is licensed under <a href="http://creativecommons.org/licenses/by/3.0/" title="Creative Commons BY 3.0">CC BY 3.0</a>. Check out the new logo that I created on <a href="http://logomakr.com" title="Logo Maker">LogoMaker.com</a> https://logomakr.com/9AaxBH9AaxBH

Wordpress graphic by <a href="http://www.icons8.com">icons8</a> from <a href="http://www.flaticon.com/">Flaticon</a> is licensed under <a href="http://creativecommons.org/licenses/by/3.0/" title="Creative Commons BY 3.0">CC BY 3.0</a>. Check out the new logo that I created on <a href="http://logomakr.com" title="Logo Maker">LogoMaker.com</a> https://logomakr.com/5TOA6O5TOA6O

Heart graphic by <a href="http://www.flaticon.com/authors/zlatko-najdenovski">zlatko_najdenovski</a> from <a href="http://www.flaticon.com/">Flaticon</a> is licensed under <a href="http://creativecommons.org/licenses/by/3.0/" title="Creative Commons BY 3.0">CC BY 3.0</a>. Check out the new logo that I created on <a href="http://logomakr.com" title="Logo Maker">LogoMaker.com</a> https://logomakr.com/6RMEjk6RMEjk
As Featured On
Use the as featured on section to excited readers with your previous exposure. Also can be an advertisements section.
Edit homepage using UX builder
Click Add to Content > Row > choose how many columns > Apply
In column spacing choose Collapse, then in width choose Full
Click Apply
Click in the middle of a column to Add Elements > choose Text > choose Paragraph > Apply
Open Text Editor and upload your logo image
Drag to the correct height
Click OK, Apply, Update
Repeat for each logo image
Payment Methods for a WordPress Ecommerce Website Made Easy
Our online store will accept payment via 4 methods by default but you can add more or get fancy later on. Keep in mind that sites like Amazon.com use Credit and Debit card as their preferred payment method, so we will too!
Click WooCommerce > Settings > make sure your General options and Currency options are setup
Click Checkout and enable coupons and guest checkout
Setup BACS: enable it, change description as per video, add your bank account details, save changes and all set!
Setup Check payments: enable it, change title and description as per video (add your own address), save changes and all set!
Setup Cash on delivery: enable it, change title and description if you’d like but not necessary, save changes and all set!
Setup PayPal (preferred payment method): enable it, change title to “Credit and Debit Card” description to “We use PayPal to accept Credit and Debit Card Payments. You can also pay with a PayPal balance.”, add your own PayPal email, make sure PayPal sandbox and logging are unchecked, save changes and all set!
Shipping Methods
Now for probably the most boring ending to any of our ecommerce website tutorials ever, how to setup shipping methods in WooCommerce 🙂
Let’s setup a common example of shipping so know how to charge customers for shipping if you’d like to!
Go to WooCommmerce > Settings > Shipping
Add a zone which includes the majority of your customers, note that simple calling a zone “USA” does not automatically apply to this geographic region
Open the Zone and click Add Shipping Method
We will add Flat rate first
Next, let’s add Free shipping based on a minimum order amount
Finally, let’s add Free shipping based on a coupon we can create then give out as a promotion
You’ll need to visit Coupons, Add Coupon, then check Allow free shipping. That’s all you need to create (plus a name for your coupon) in order for this coupon to give a customer free shipping. Hit Publish and you’re all set!
Please refer to the full video embed here:
Third Section: Create Cool E-commerce Website Subpages
More easy ecommerce website tutorials to create your online store website in WordPress perfectly are now out! Please see below and let us know if you have any questions in the comments. To stay tuned on our next tutorial, please subscribe here.
Ecommerce Website Contact Page
Quick Website About Page
Ecommerce Website Our Stores Page
Comments are open for Create an Ecommerce Website in WordPress!
As you can see above this is about 95% done, what’s missing is your website and feedback!
So now it’s your turn.
Please drop a comment to say hi or ask a question, help each other out and have fun as you create an online store eCommerce website in WordPress.


Thanks for everything greg
Great to see the sub pages added
Its amazing what you are doing
I would like to learn more and help you aswell if that is possible
Thanks George. Couldn’t do it without readers like you. We are open to help. Would you like to guest post perhaps? Can send to guestblogging@dearblogger.org if so! 🙂
Hi Greg,
this is an awesome video and exactly what i was looking for after fighting with some included themes in a plugin I purchased, just could not get the look I wanted.
I built out the demo site with you but i don’t get the registration page as you do when I click login. Where are the setting for that or is there something I missed.
Thanks Adrian
Hi Adrian, can you try going to woocommerce > settings > accounts and check both boxes next to Customer registration? If that doesn’t fix it, please send me a screenshot to greg@dearblogger.org and we’ll dig deeper.
Also here is a screenshot of active plugins on makeawordpresswebsite.com https://dearblogger.org/wp-content/uploads/2018/01/Screen-Shot-2018-01-16-at-1.29.37-PM.png
Thanks!
Greg
Hi! I already have vantage on WordPress. Do I have to get a new theme to add ecoomerce? Or can I just get a bunch of plugins? Also, I would not necessarily be selling my own stuff just working with affiliates, like small businesses and large wanting me to plug in their stuff to sale and then me getting a percentage from sale. I hope I made sense.
Thanks so much!
Well I got as far as being able to click on the 6.Click Get Started with WordPress Today … from there, it does not prompt me to anything but to stare at a black page. Not too impressed with hostgator so far. Perhaps it is a glitch? I just know I signed up for 24 months…. hoping it is not like this! Any suggestions on what to do?
I’m with you now Susan, sorry for this glitch. From that same Hosting tab in your Customer Portal, can you try clicking Launch Quick Install under Popular Links, then click WordPress under Site Builders & CMS, then proceed the same way. These are multiple ways to do the exact same wordpress installation. Let me know how it goes. – Greg
hi, as always your tuts are great, thanks, just one question , with flatsome/uxbuilder can I build a page, say a coming soon page , and use it on another website?? I know it’s a silly question but who better to ask
Daniel
hi , really great tutorial with flatsome I learned lots , hope you are still planning on doing, totally worth it thanks again
Third Section: Create Cool Subpages,
is there a way to get a notice of when it’s available? do you have any other information on using flatsome 3, I ‘m struggling with creating new pages ex: about us page , it’s hard to find for flatsome
thanks
Daniel
Thanks so much Daniel! Glad you could join us to build your ecommerce website. I am preparing to produce this video now, and totally understand, the subpages can be confusing.
I’ve used the Documentation here and asked Flatsome support too http://docs.uxthemes.com/
Have you tried emailing them? At the bottom of this page you can click Contact Author https://themeforest.net/item/flatsome-multipurpose-responsive-woocommerce-theme/5484319/support
Any other issues from the video?
Greg
thanks for hat quick reply,
I have gone through the docs but cannot find info that I needed, Flatsome needs another mindset it’s great, not what i’m use to. but I still have lots of discoveries to do -:)
if I could figure a way to copy elements from the demo pages to my new page , maybe I could make it work
looking forward for your video on subpages, I’m sure it will be great.
My site will be up soon thanks to your excellent guidance, and your blog “dearblogger” is amazing just love it, so much information
Daniel
“WordPress will do it’s thing”.
Sorry, it is not «it’s» but it is «its» (possessive): “WordPress will do its thing.”
YAY! Thank you so much for that correction! 🙂
Hello GREG omg I cant i am very thankful to you for your guides ….really i hired 2 developer who took money but never delivered the work …..now after seeing your videos i feel i can do it my self ………..but i in great CONFUSION … I like the style formats of Mr tailer and Shopkeeper (kinda designer feel giving) but as not from IT field i feel flatsome very first timer user friendly ……..can i you plz put some light which one shall i choose …….can i give flatsome look like shopkeeper (mainly big pictured 2 products in row kind of thing)
Thanks n Regards
Hi Greg,
you made a great tutorial and it `s very very helpful to me.I have a very critical question to ask you,does the Flatsome be able to command or control the Password Strength Settings of woocommerce registered function? Because the woocommerce Password Strength Setting was so stringent and difficult to customer.If the Flatsome did`t have such functions,could you please recommend a good plugin or tool or methods to me?
Thank you .
I learned some new stuff by watching the video…I like the Flatsome theme used in the video and the functionality of the Woo-commerce, e-commerce site are exactly what I need…good stuff.
Yay! It’s so much fun. I hope it’s truly an eCommerce website made easier for beginners 🙂
Hi Greg,
I loved this. Awesome stuff. It seems you took a whole year getting it together.
Share some ideas how not your eCommerce business to ruin you.
Again, am glad I got a copy of this in my email
Thanks
Basically a year. Thanks for checking the email. Wish everyone was like you 🙂
Any site can get frustrating. eCommerce biz or not. Give it time. Work on multiple sites. Don’t put all eggs in one basket. Write for other sites too, that’s a big stress reliever for me.
Cheers man!
Greg
Am really stuck right now, am confused on how to set an amazone affiliate website with flatsome and embedding the amazon affiliate plugin and again is ut possible for me use two different woocommerce plugin on a website (woo commerce plugin and amazon affillate woocommerce plugin) help me out please.
What would you recommend for someone who already has a blog? Could it be integrated with Flatsome in some way?
Definitely enter the Flatsome giveaway if you haven’t already. The blog feature there is awesome. You could import your posts.
But my advice to someone who wants to move a blog (not sure if that’s what you’re thinking at all) is actually to keep the blog intact and start a new site. The design changes in moving a site are immense and a lot of work, and having two sites really takes the pressure off of the first one’s success. You can mention your sites on the other one, build SEO, and just have a lot of fun.
Does that help much, Diana?
This video bangs!!!
Well I reckon that’s a good thing 🙂