Have you just bought a GoDaddy domain and are now looking to build a website on it?
For years we’ve been helping YouTubers make a WordPress website starting with just a GoDaddy domain. When a reader tweeted us asking for a simple written guide, we figured we’d jot down the steps here.
There are so many great ways to start a website with a GoDaddy domain – here’s the method we’ve perfected we use for clients and blogs alike to get a WordPress.org site up on a super slim budget.
Step 1: The GoDaddy Steps
The GoDaddy steps are really basic here, let me explain why:
In this tutorial we’ll use GoDaddy for the domain name – GoDaddy are the best domain registrar on the planet and keep your domains super safe. We’ll then choose a web host which we need to install WordPress. Unbeknowst to many however, GoDaddy is actually not that great of a web host – in fact everyone I talk to who uses GoDaddy for web hosting, email, etc ends up switching to another web host for one simply reason: service.
GoDaddy simply doesn’t have time to help much outside of domain names. It’s like if you went to Burger King and asked them how to setup a grill and grill a few hamburgers. You’d be better off asking Home Depot instead. Others web hosts (which we review each month) offer wayy more features and more modern dashboards and essentially try harder for your business, so we want that. It’s how we roll at DearBlogger BTW.
So, we will register a the domain, then see how to get the best hosting possible for your new website or blog, then install WordPress, then connect it all!
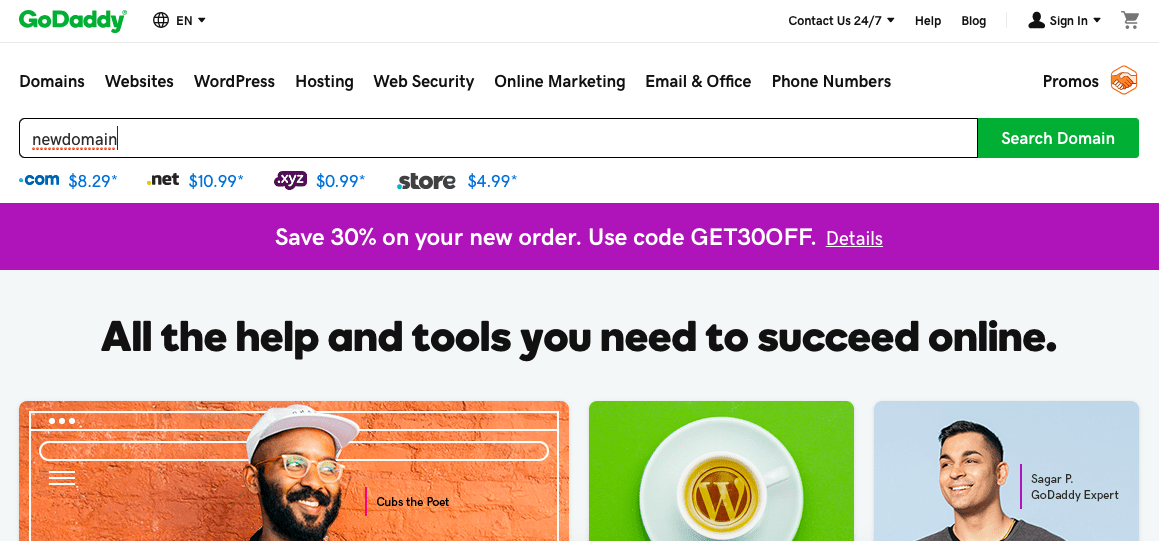
To get started, just visit GoDaddy.com and enter in your new domain name. Then click Search Domain.
On the next page GoDaddy will tell you if your idea is available. If it’s not, try changing up the wording, adding a keyword to the end of it like “gregnarayanBLOGGING.com” or just register your firstnamelastname.com. Don’t get more than one domain unless you have a large budget or are very worried your idea will be taken. Always get the .com first – it’s the most recognizable and most valuable if you ever want to sell it. That said, click Add to Cart.
Then at the top, click Continue to Cart.
On the next page, Uncheck Privacy, Start your website for FREE, and the email option. You can always add these later, but remember we want to use GoDaddy for only the domain name because domains are their speciality and there are better ways to do everything else. Click Continue with these options.
![]()
On the next page, you’ll be asked to create a new GoDaddy account for free or sign in. Go for it.
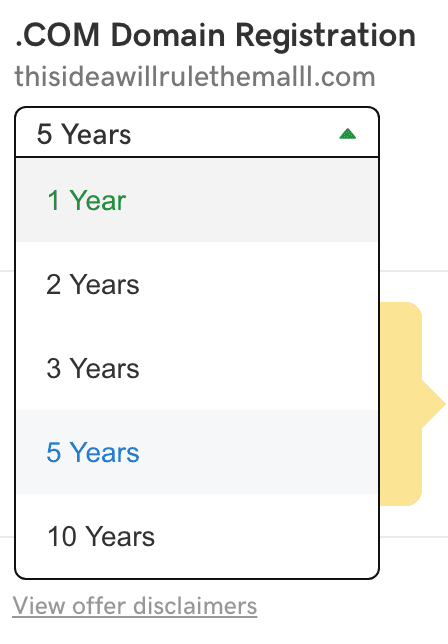
Then, you just need to change the time period of how long you’ll register the domain for, ideally just 1-2 years to try it out, then after you add a payment option, you can click Complete Purchase.
It’s a great feeling taking a domain name off the market all for yourself! Congrats! You can leave your domain name there for now and don’t need to change any settings yet.
Step 1 is done, take a break if needed, and let’s move to Step 2: Setup Web Hosting when you’re ready!
Step 2: Setup Web Hosting
Web hosting is the space where your website lives. Every WordPress website needs hosting and it’s become really easy to setup.
Like we said above we review hundreds of web hosts. We have in-depth reviews of lists of 10 or so great web hosting options whether you live in USA, Canada, UK, India, and more. All the steps going forward in this tutorial should be generally the same at each web host (prices and how they look will vary a bit).
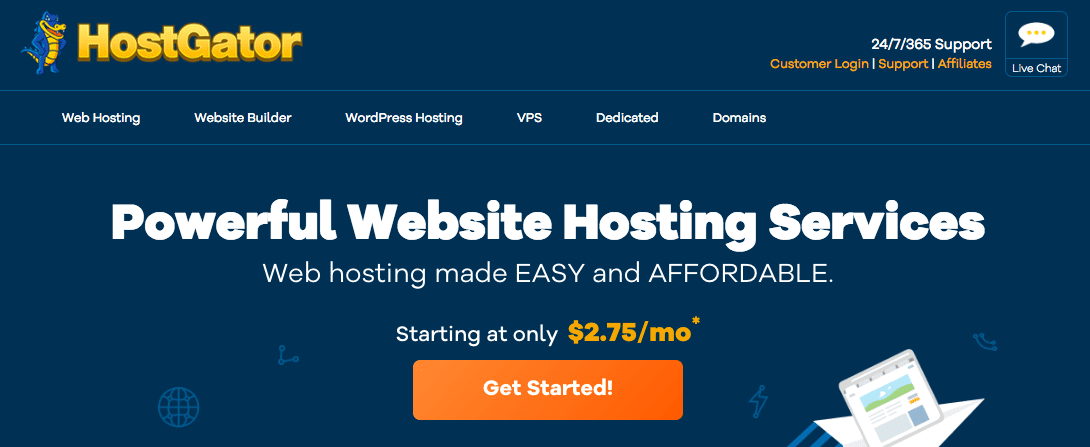
For this tutorial, we’re going to use the one web host that seems to perform consistently well each year globally: HostGator.com. HostGator hosts countless WordPress websites and has been our home for years here at this blog. You get 45 day money back guarantee and all sorts of features you don’t find elsewhere like a free SSL certificate and 100 Adwords Credit. You really can’t go wrong here.
To setup hosting at HostGator, then install WordPress, then lastly connect it to your GoDaddy domain, follow these steps!
Disclosure: We receive a commission from HostGator at no additional cost to you if you click through the links on this page and sign up. In fact the cost to you will be less because of the deals we can offer thru HostGator. We review lots of web hosts and only pick the best web host for each guide. Thanks, your support helps us keep providing free advice!
First, visit HostGator.com and click on Web Hosting. This brings you to their cheapest WordPress friendly plans.
On the next page you can choose either Hatchling, Baby, or Business. Business is too much for now.
Choose Hatchling if you just want to create one website. Choose Baby if you want to create one website today and make multiple websites later. Other than that, the two plans are identical and you can always upgrade at any time, making Hatchling probably the best choice. Click Buy Now!
Next you’ll be in the HostGator Order Form. In part 1 on this page, choose “I Already Own this Domain” and enter in your full domainname.com which we bought above at GoDaddy. The rest of this page is pretty self explanatory but here are some key notes. In part 2, you’ll see greatest discounts for longer periods of registration. Keep in mind that if you see a number like 12 months @ $5.95/mo – 33.52% off! that price of $5.95 already includes the 33.52% off discount. That tripped me up at first.
In Part 4, you should uncheck all the additional services to save money. Then in step 5, you should enter our coupon BIGBONUS and see if it increases your discount to something like 50% for the 1 year mark, which I find is best to start out. If this works, great! I get a little credit, you save boom.
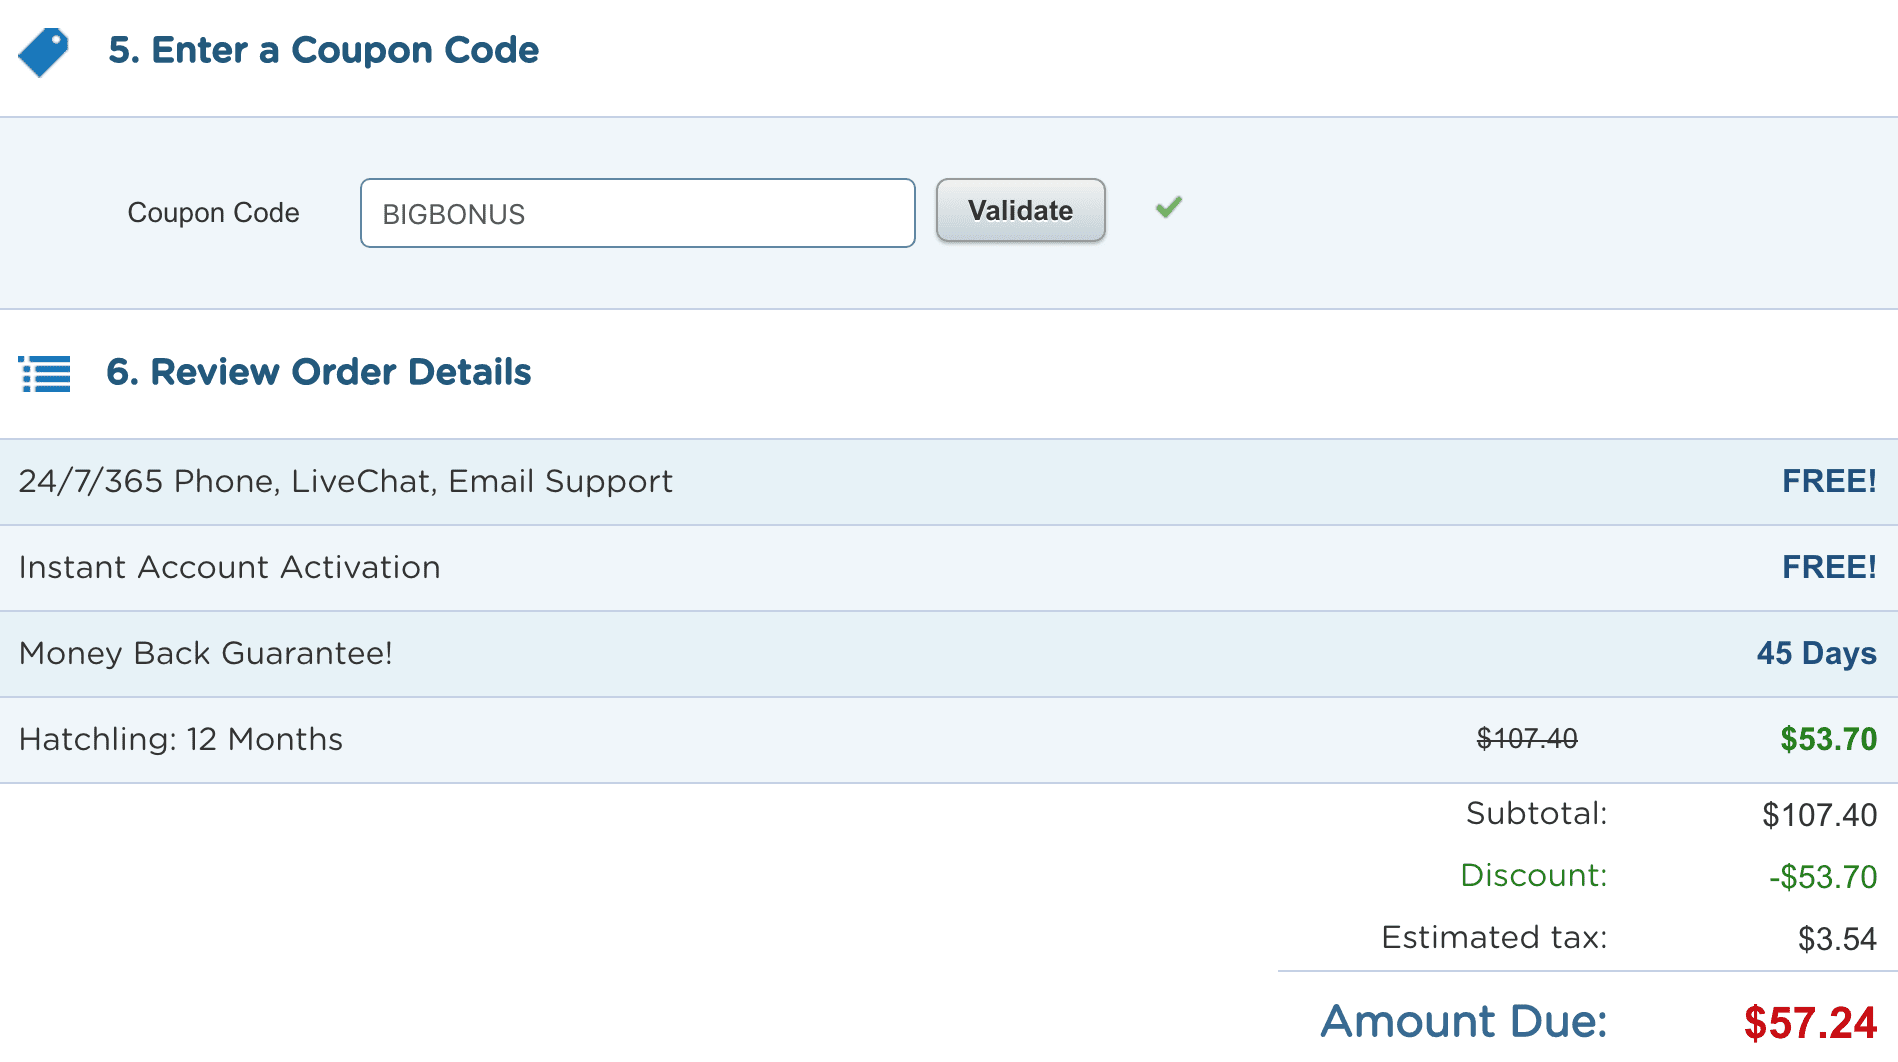
Please let me know in the comments any questions about the price at the bottom. Ideally it should be under $60 for 1 year, well less than $10/mo. There are plenty of ways to make money on WordPress to make this back, if you don’t already have a plan for that, btw!
Okay, now when you’re ready just check that box for the terms, then click Checkout Now!
Step 3: Install WordPress.org
HostGator will take a 5-10 seconds to setup your account for you, then you’ll be taken to the HostGator Customer Portal and you’ll see a Welcome to the HostGator Family Screen. Nice!

Click on the tab that says Hosting, then click on the black WordPress icon titled Get Started with WordPress Today.

It may read something different like “1-click WordPress installation” or say “Quickinstall”. Either of these will work!
Next, select your domain and leave the /directory box blank, and click Next.
Now enter the following:
- Blog title: Should be your domain name
- Admin user: You can’t change this, it’s your username at WordPress aka this post by “username”
- First name
- Last name
- Email where they will send your WordPress login info
That all done, check the two boxes, and click the orange Install button.
You’ve now successfully installed WordPress, congrats! HostGator will show you your installation details. Go ahead and copy these into a blank text file.
If you got an error message saying directory not empty, check this out.
If you click on your domain name, it won’t work quite yet, because we have one more step before we can login to WordPress, which is to change your nameservers.
Step 4: Change Your Nameservers
Okay, almost to the finish line now. Nameservers are pieces of information which tell the Internet where your domain name should take people. By changing your nameservers, you can have people who visit your domain name see something you make on one server, or a totally different server, it’s up to you!
If you go on to become your own web designer, you will hear about Nameservers on every project, because changing them is how you often make a new website go live.
What you need to do now is first go to your email inbox. HostGator will have emailed you Your Account Info, which is simply the basic account info you have to keep for future changes (like this one).

You want to enter the 1st Nameserver and 2nd Namesever at GoDaddy to connect your domain to the hosting.
So, head to GoDaddy and login.
Once you login, click on your Name in the upper right, then click Manage My Domains.
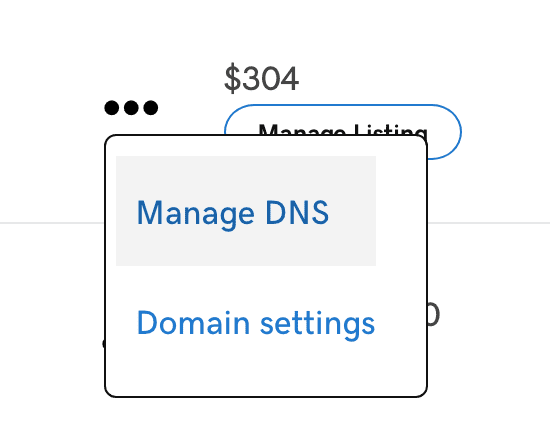
Next your domain name, click on the three dots ··· then click Manage DNS.
Scroll down to Nameservers and click Change. Then go from Default to Custom in the drop down menu. Write the 1st one in the upper box, the 2nd one in the lower box, and click Save.
All done!
Now, you simple have to wait for propagation to complete, which, sadly, can take up to 72 hours (but usually much less in large cities).
You can keep trying to visit yourdomain.com/login until you finally see this screen and basically do a backflip:
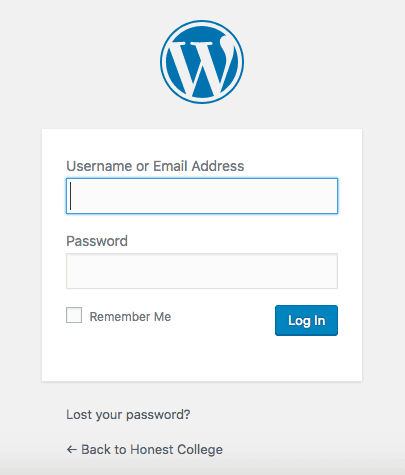
So, that’s pretty much it!
If you’d rather watch a video of how to complete the above 4 steps then actually build out many of the awesome features inside WordPress, then check this out:
Conclusion: What Will You Do Now That You Know How To Make a WordPress Website with a GoDaddy Domain?
Now that you know how to make a WordPress website with a GoDaddy domain, what will you do next? You can register a domain for a client, then add that website to your HostGator plan and build a website there.
You can create an eCommerce site, business site, fitness site, or whatever you want with WordPress, while starting with a cool GoDaddy domain name. So far I’ve made a gardening website, marathon website, hotel site and several blogs!
For the comments: Please review this guide! Let me know where you got stuck and if anything looked different for you to help all those coming after you! Thanks so much, was a pleasure to write this one! Cheers, Greg
You have well explained about WordPress Website Or host gator .That’s a great information you have shared with us. all the point are easy to understand and valuable. Really Its Amazing Articles. keep posting Related articles.
This is Really Very Helpful to me
Very Good Greg
How to convert your small business retail store into e-commerce?
Just create this website in the video then add Woocommerce for free!
Thanks for sharing this informative post.
hey thank you so much for sharing those best ideas and awesome information with us, very informative and nice article. thank you so much again, going to read your another article soon.
Informative post. Start my business soon, your post really settle my problem about the domain. Thanks!
Great share, Greg. With GoDaddy coupons and low price of HostGator, it has become super easy and affordable to start a blog in 2019.
I usually go with NameCheap (because of free whois) but for beginners, GoDaddy is definitely a great option.
Thanks for the amazing share.
Regards,
Brandon
Totally easy and affordable. Was just explaining to someone how I used to love Blogger bc WordPress was all tough and costly but those days are long gone.
What kinda domains/blogs are you pursuing these days?
How did I not know that about the free whois ? *facepalm*
NICE POST
Thanks! :)))
Hey Greg,
A Great Information that I went through now. GoDaddy is offering great services to our people and especially WordPress hosting is their shining star product as I have WordPress Hosting with them already. Today for knowledge development while searching online, I landed on your post and it was really interesting though I have shared a word in my Social Network.
That’s super cool, I guess maybe GoDaddy is make their WordPress hosting into something big. Where are you based?
Really wonderful!
Great! job Greg
Thanks for your comment!